

Microsoft’s uber-popular writing and documenting app MS Word has come a long way since it was released way back in 1983. The Redmond giant has never stopped improving Word over the years, and now the app, which is a part of the MS Office bundle, comes with useful writing and editing features.
Keeping these features aside, I think one of the most underrated features that MS Word offers is the ability to password-protect documents. It is a very handy feature for those who use Word to work on confidential documents and store them.
So, in this article, I am going to tell you all about password-protecting a Word document on Windows 11. I will provide step-by-step guides to enable and disable password protection for specific Word documents in MS Office on Windows 11. Read on till the end.
Here’s How You Can Password-Protect Word Documents on Windows 11
Now, below I have provided the steps to add password protection to Word documents as well as steps to remove it. However, before I move on to them, there are a few important things that you should know.
Things to Keep in Mind Before Password Protecting Word Documents
It is worth mentioning that once you add a password to a document, you will need that password to open the document and disable password protection if needed.
And as Microsoft does not store your password(s) for Word document(s), if you forget the password in the future, there is no way to retrieve the document or disable the feature for it.
Hence, when you set a password for a Word document, write it down on a personal note or store it somewhere secure where you will be able to access it when needed.
Now, with these out of the way, let’s get into the steps.
How to Enable Password Protection for Word Documents?
To password-protect a Word document on Windows 11:
Step 1. Open the Word document that you want to password-protect.
Step 2. Click on the “File” option on the top menu bar.
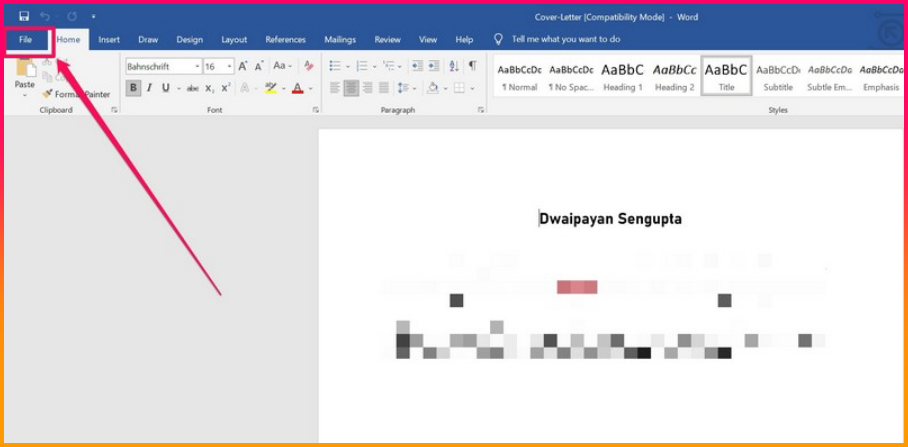
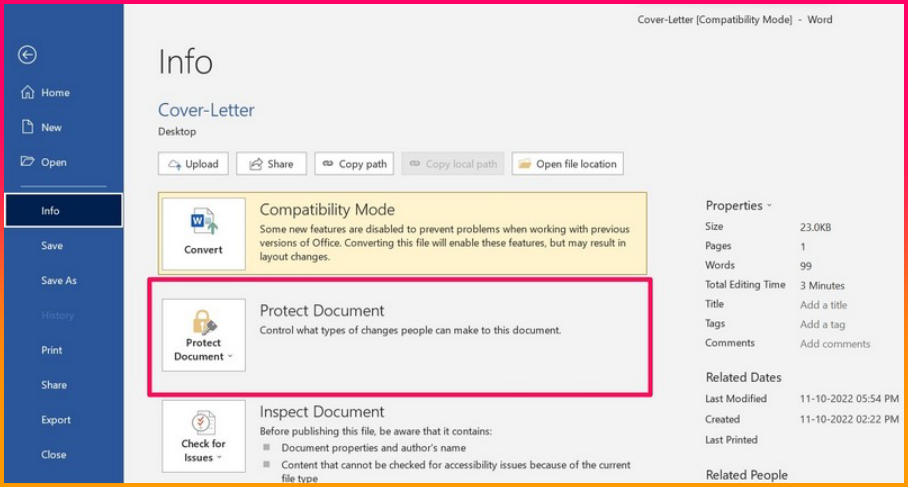
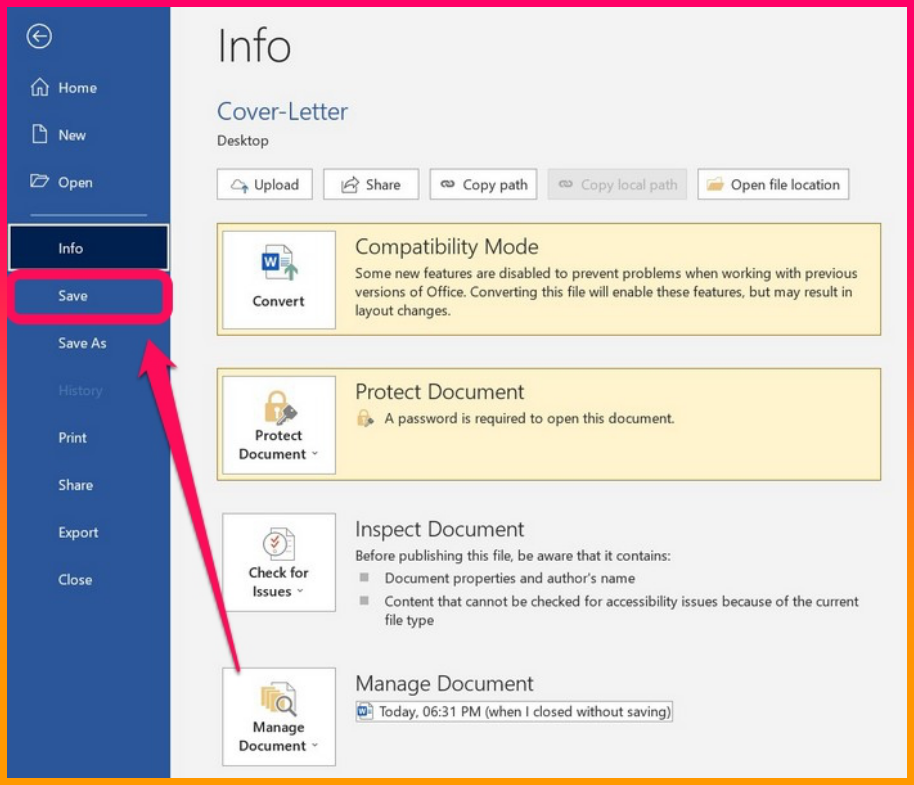
Step 3. Now, click on the “Info” button on the side-navigation bar.
Step 4. Here, click on the “Protect Document” button.
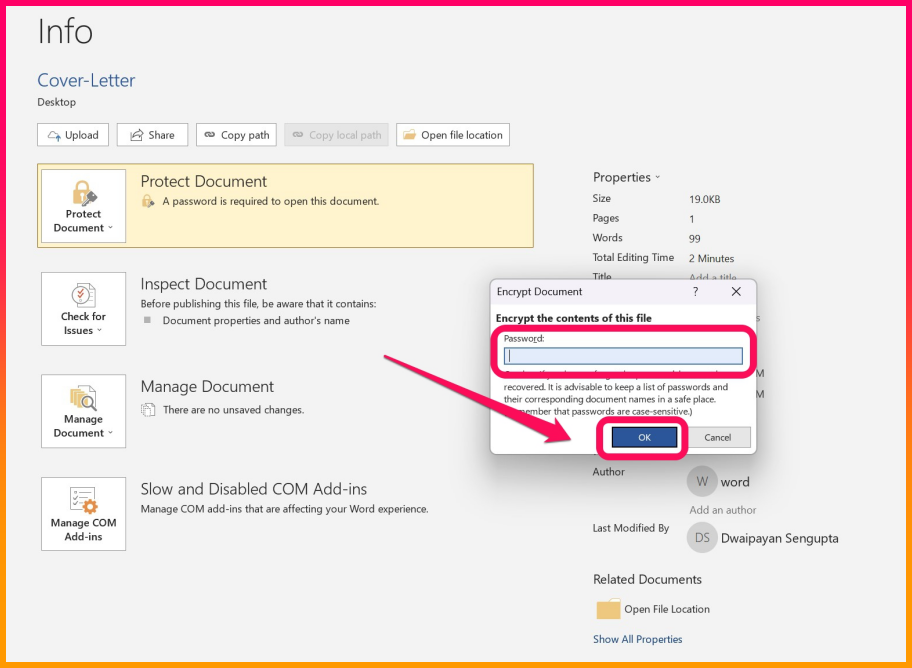
Step 5. Now, click the “Encrypt with Password” option.
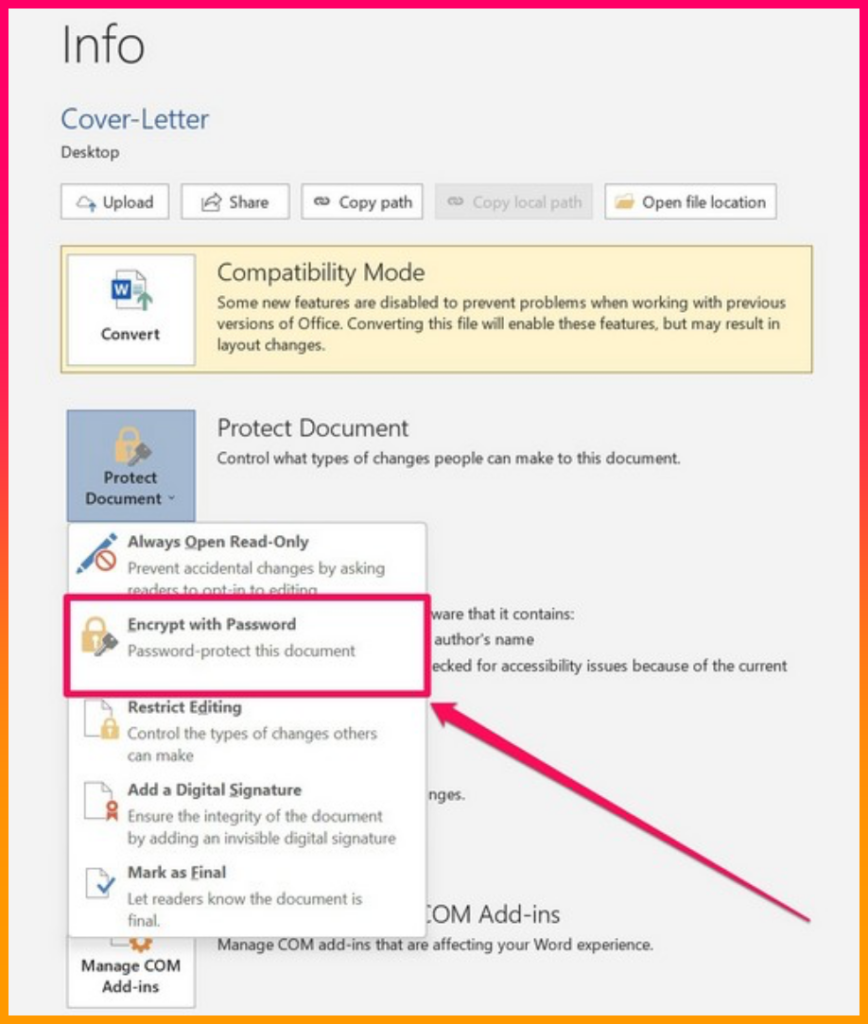
Step 6. Enter your desired password.
Step 7. Confirm it by re-entering the same password and click the “OK” button.
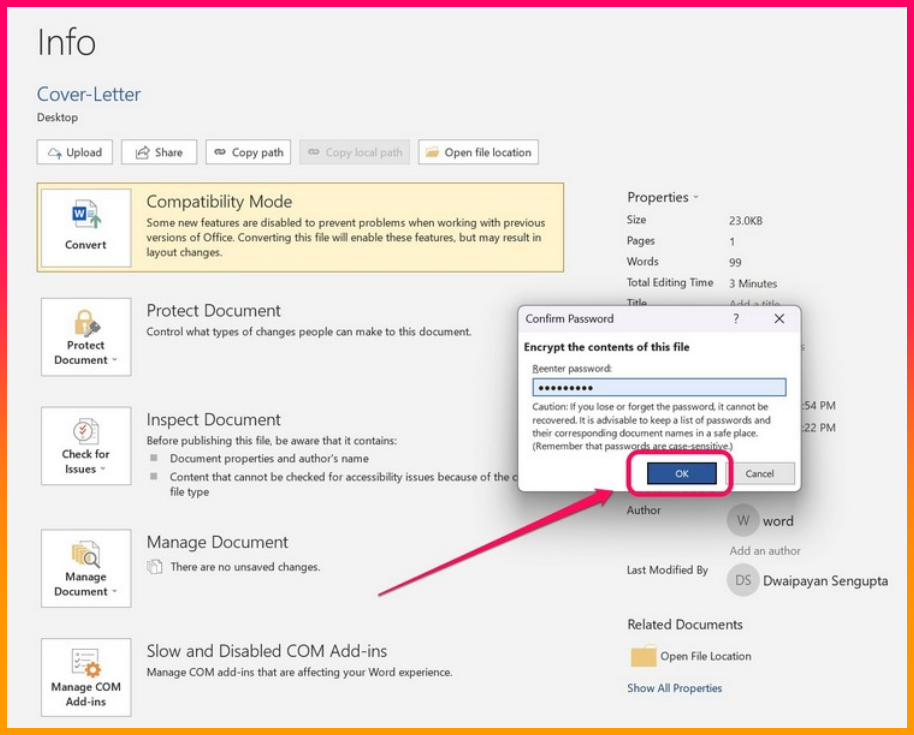
Step 8. After enabling password protection, you must click the “Save” button on the sidebar to save your action. If you close the document without saving it at this stage, your document will remain unprotected.
So this way, you can easily enable password protection for specific Word documents on Windows 11. Now, when you open the Word document after closing it, you will be required to put the password to view or edit it.

How to Disable Password Protection for Word Documents?
Now, if you want to disable the password-protection feature for a Word document for which you enabled the feature previously, it is as easy as enabling it. Simply, follow the steps below.
Step 1. Open the Word document by putting in the password for it.
Step 2. Go to the “File” option from the top menu.
Step 3. Then go to the “Info” section.
Step 4. Now, click the “Protect Document” option, which should already be highlighted.
Step 5. Click the “Encrypt with Password” option on the context menu.
Step 6. Clear the previous password in the text field.
Step 7. Click the “OK” button on the dialog box to disable password protection for the said Word document.
Step 8. Save the changes for the Word document.

So, as you can see, the process of enabling or disabling password protection for Word documents is as easy as a Sunday morning. Anyone with basic computer knowledge can password-protect their Word documents.
Why Do I Need to Password Protect My Word Documents?
Now, if you are wondering why is there a need to password-protect Word documents, let me explain. The feature might not be important to your documents but for someone who uses Microsoft Word to store confidential or sensitive documents relating to their work or personal life, this feature is a godsend.
Also, if you have Word documents containing your bank account details, passwords, and other sensitive data, I’d recommend you add a password for these documents to prevent unauthorized access to them when someone else uses your device.
However, do not forget the password you set for your documents. In that case, you will lose the document forever.
Endnote
So, this was all about password-protecting Word documents on Windows 11. If you were looking for this how-to on the web, I hope this article helps you. And if it did, tell us in the comments.