

Whether you are an account manager or an HR, I am sure that Microsoft Office’s Excel plays a huge role in your daily life. You clicked on this article to know how to password-protect your MS Excel document, right? Well, you’d be glad to know that you did the right thing and came here.
In this article, I am going to explain all about password-protecting your Excel document to help you secure your invaluable data from prying eyes and unauthorized individuals.
So, read on till the end to know how you can add a password to your Excel document and also remove it when you do not need it.
Here’s How You Can Password-Protect Excel Documents on Windows 11
Now, before I move on to the steps to add or remove the password protection to/ from MS Excel documents on Windows 11, there are some things that you should know.
Firstly, there is the risk of losing a password-protected Excel sheet forever if you forget the password itself.
You see, when you set a password to your Excel sheet(s), the password is only stored locally on your device and is not shared with Microsoft in any way. Hence, if you somehow forget the password for an Excel sheet for which you enabled password protection previously, there is no way to retrieve that document.
Secondly, I will be demonstrating the steps to password-protect your Excel sheet(s) in MS Excel 2019 on Windows 11. However, the steps are the same for other Excel versions on previous Windows builds.
Now, with these points out of the way, let’s get into the steps, shall we?
How to Enable Password-Protection for Excel Documents?
To add a password to your MS Excel document on Windows 11:
Step 1. Open the Excel sheet that you want to password-protect.
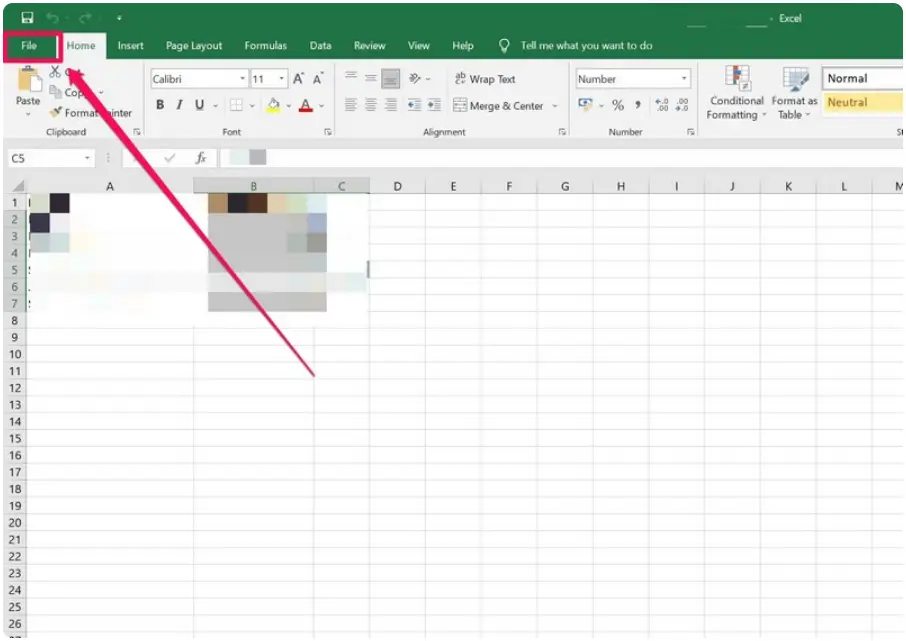
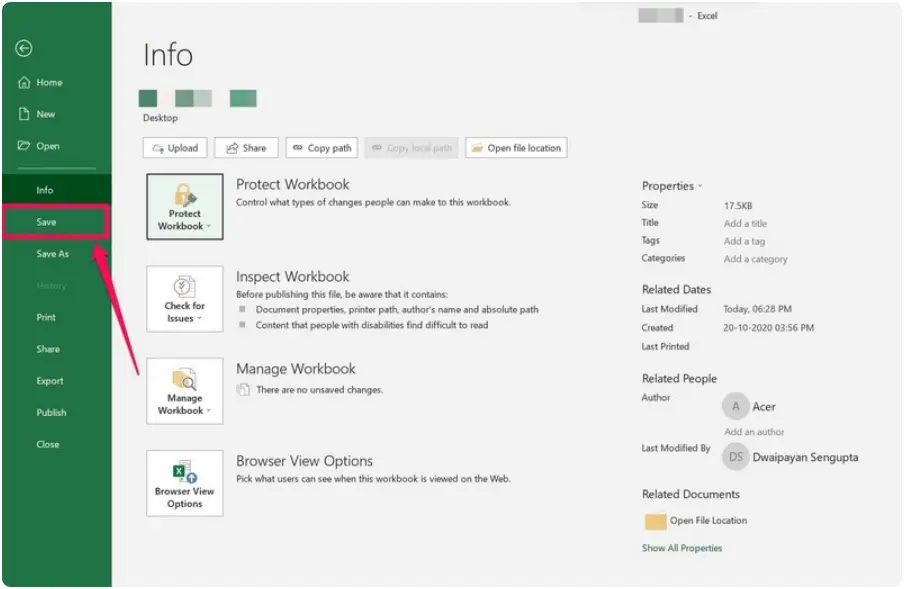
Step 2. Go to the “File” option from the top navigation bar.
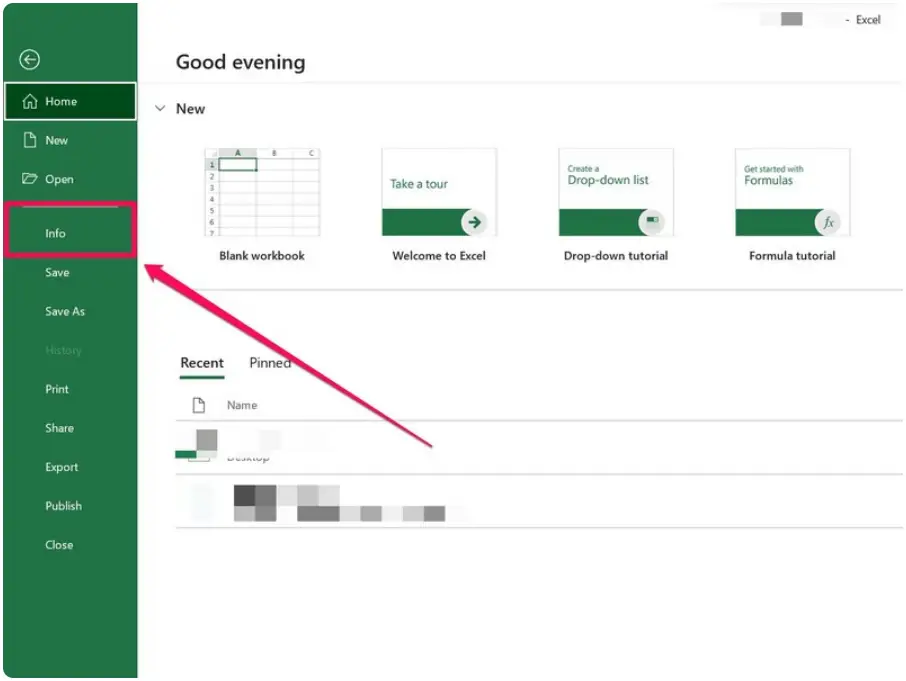
Step 3. Click the “Info” option on the side-nav bar.
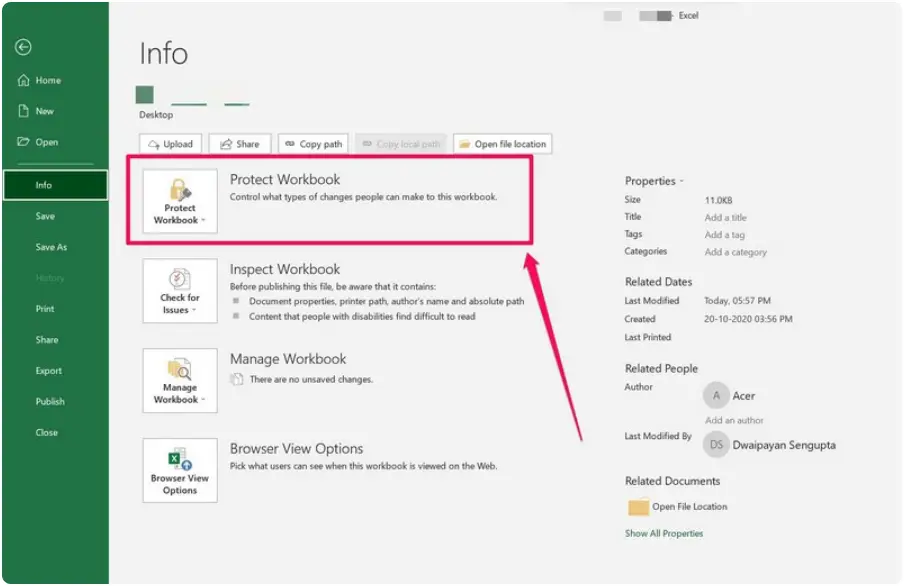
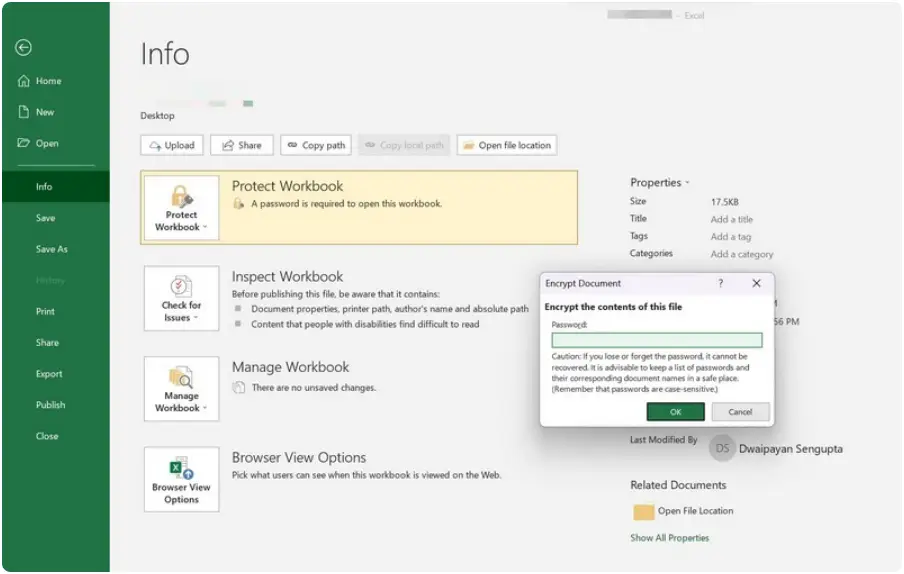
Step 4. Now, click the “Protect Workbook” option at the top to open the context menu.\
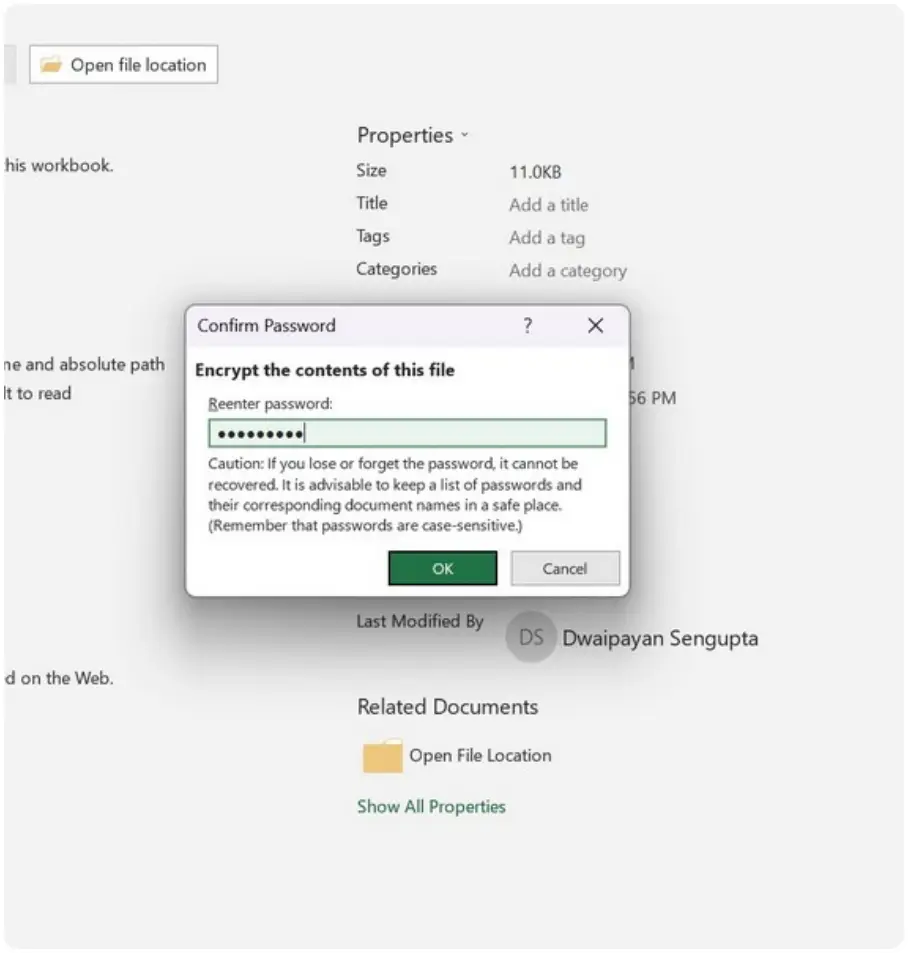
Step 5. Click the “Encrypt with password” option.
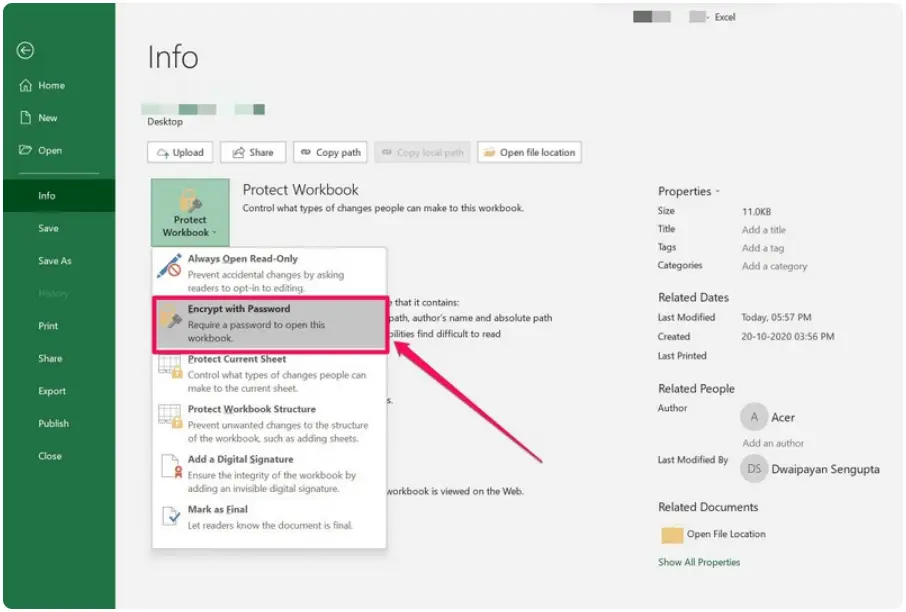
Step 6. Set a strong password for the Excel sheet and re-enter to confirm it.
Step 7. Click the “Save” button on the side-nav bar to apply the change and enable password protection.
So this way, you can easily set a password for your Excel sheets on Windows 11 and secure them to prevent unauthorized access.
This is especially useful for corporate executives and entrepreneurs who keep confidential business data stored in MS Excel on their Windows 11 devices.
However, in the future, if you feel that an Excel sheet for which you set a password previously does not require additional encryption anymore, you can remove the password-protection function for it just as easily as you enable it.
How to Disable Password Protection for Excel Documents?
Below, you will find the steps to disable password protection for an Excel sheet for which you have previously set a password.
Step 1. Open the Excel sheet and enter your password.
Step 2. Go to the “File” option from the top-nav bar.
Step 3. Click the “Info” button on the side-nav bar.
Step 4. Now, click the “Protect Workbook” option, which should be highlighted.
Step 5. Click on the “Encrypt with password” option on the context menu.
Step 6. Clear the text field and click the “OK” button.
Step 7. Click the “Save” button on the side-nav bar to save your change.
So now, the Excel sheet will not be password protected and can be opened by anyone on your Windows 11 device.
Wrapping Up
So, this is all about password-protecting Excel documents on Windows 11. This password-protection feature is truly underrated and is available for all MS Office apps, including Word, and Powerpoint.
It helps users to add an additional layer of security to their confidential documents, sheets, and presentations to prevent unauthorized individuals to access them, even when they are using their PC or laptop.
Hope this guide helps you add or remove the password protection to/ from your Excel documents on your Windows 11 device. And if it does, let us know in the comments. I will see you at the next one.