

Whenever you download and install the appropriate drivers for your RTX or GTX-series GPU from Nvidia, they come pre-loaded with a couple of utility programs: the Nvidia GeForce Experience as well as the Nvidia Control Panel. While both of these applications are extremely useful for controlling and modifying in-game graphical options, there are some major differences when it comes to their core functionalities.
In recent times, the Nvidia GeForce Experience has gone on to become a popular choice for PC gamers due to its wide variety of exclusive features (Automatic Game Optimization & Driver Updates, Gameplay Highlights using ShadowPlay, Live Broadcasts, and many more). On the flip side, the Nvidia Control Panel that has been with us since the days of Windows XP holds the secret sauce to getting the most out of our GPUs in terms of performance and visual fidelity.
Although many of us prefer using GeForce Experience over the Nvidia Control Panel for optimizing and enhancing our gameplay experience, we often fail to understand the importance of configuring additional 3D Settings and Display Options at the driver level. Therefore, the following sections of this article will provide an in-depth overview of specific settings inside the Nvidia Control Panel that needs to be modified for a significant uplift in image quality without sacrificing overall performance.
Update Your GPU Drivers to the Latest Version
Before you start tinkering with any of the settings present inside the Nvidia Control Panel, it is advisable to update your GPU drivers to the latest version. Fortunately, Nvidia makes this process painless by incorporating two distinct methods: downloading and installing the latest Game Ready Drivers from its official website or performing the same action via GeForce Experience.
1. Download & Install The Game Ready Drivers from Nvidia’s Official website
To download and install the latest Game Ready Drivers from Nvidia’s official website, follow these steps:
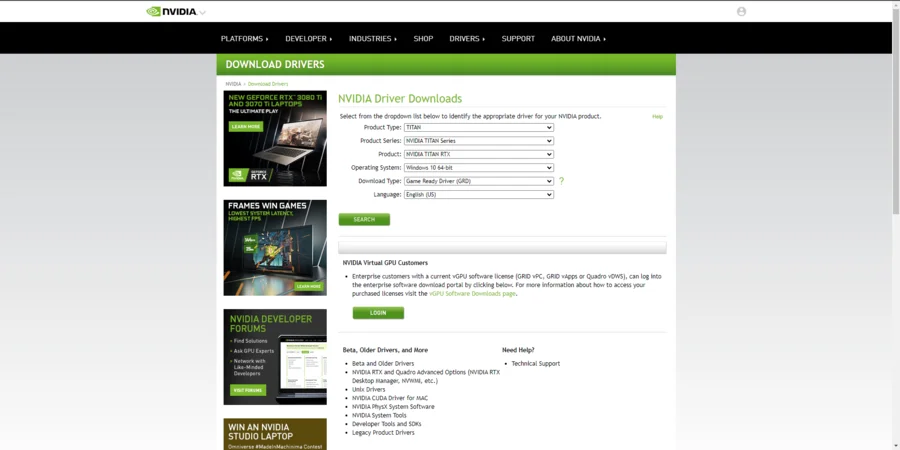
Step 1: From your preferred web browser, navigate to the official Nvidia Driver Downloads page using this link: Download Drivers
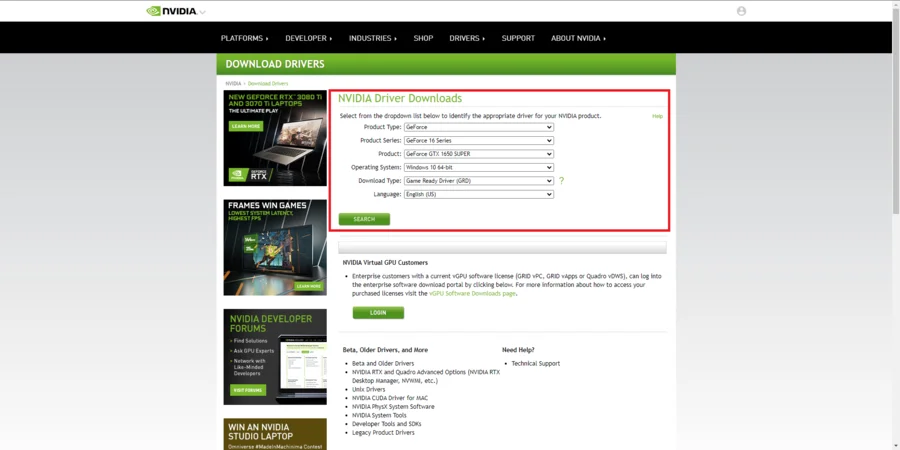
Step 2: Follow the on-screen instructions to select the exact model and series of your GPU from the drop-down menu. Once you’ve done that, click on the Search icon.
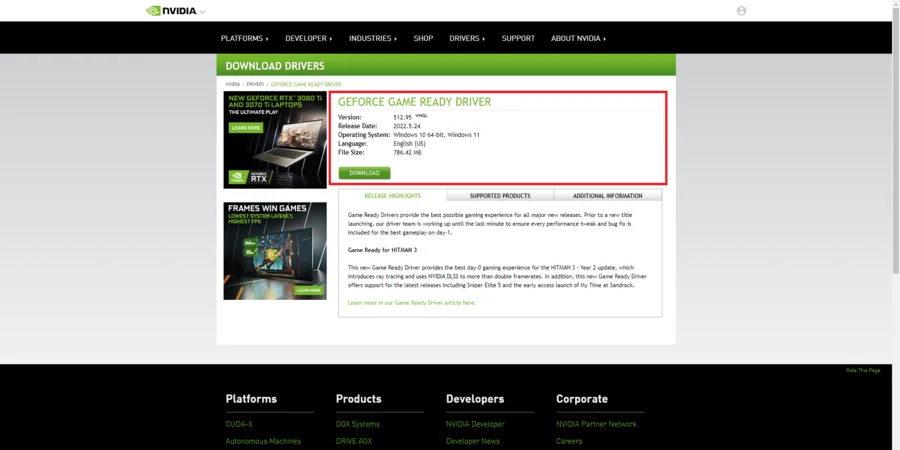
Step 3: The Automated Search Tool will list the current Game Ready Driver available for your GPU. Download the executable file on your PC and run the program to initiate the update process.
2. Download & Install The Game Ready Drivers via GeForce Experience
If you’re using GeForce Experience as your primary GPU management tool, you can download and install the latest Game Ready Drivers by following these steps:
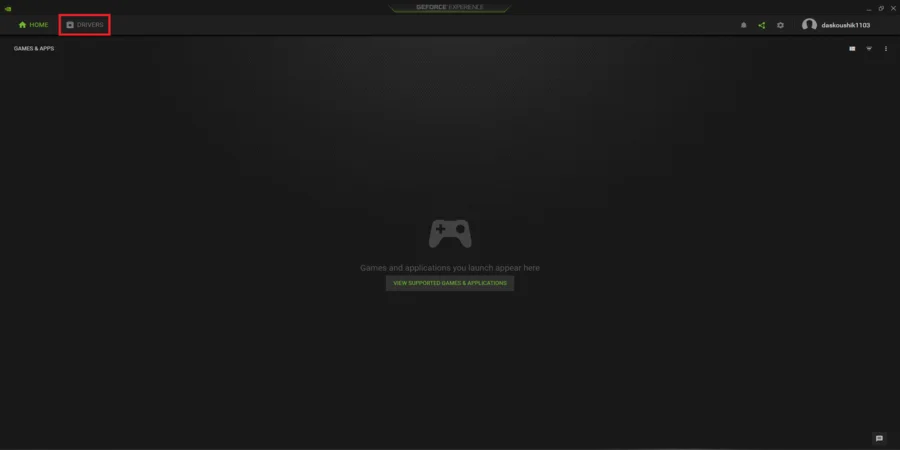
Step 1: Open the GeForce Experience application on your PC and navigate to the Drivers tab located at the top of the screen.
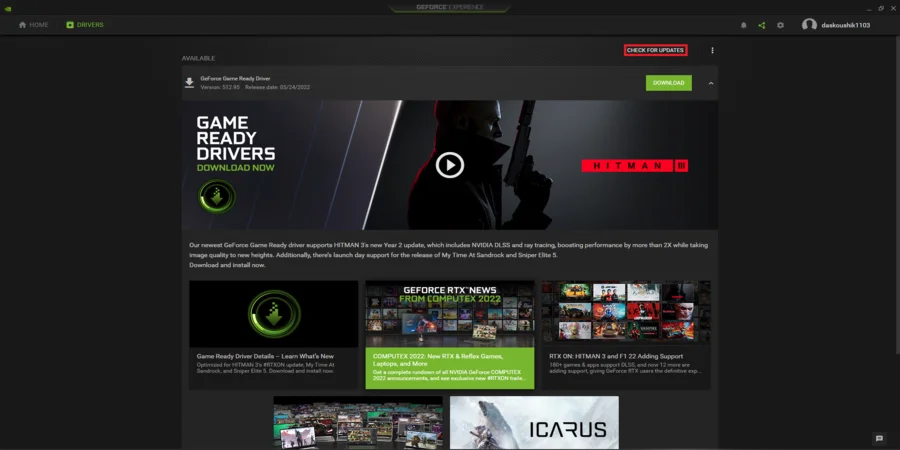
Step 2: From the Drivers tab, click on the Check for Updates option to see if there are any driver updates for your specific GPU model.
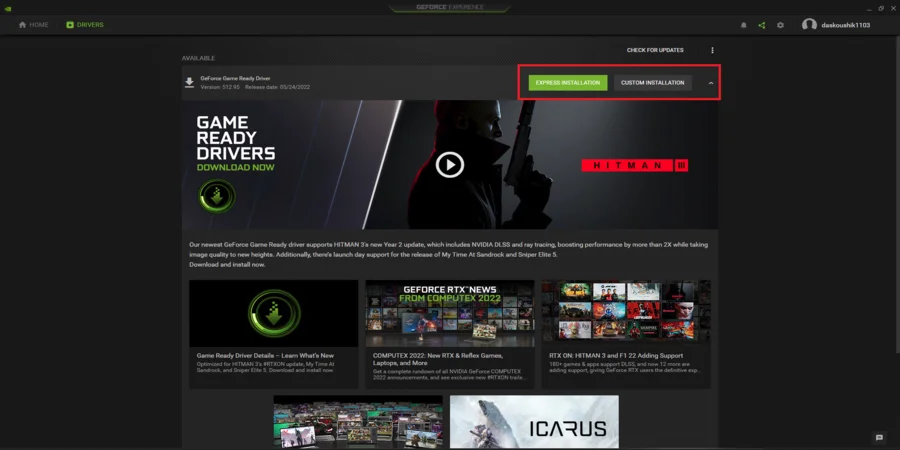
Step 3: When there is a Game Ready Driver available for your GPU, GeForce Experience will start downloading the executable file on your PC. Once it’s done, click on Express Installation or Custom Installation from the list of options to initiate the update process.
Nvidia Control Panel settings
Now that you’ve updated your GPU drivers to the latest version, it’s time to go through the list of options present inside the Nvidia Control Panel to gain a better understanding of their purpose in visual and performance enhancements.
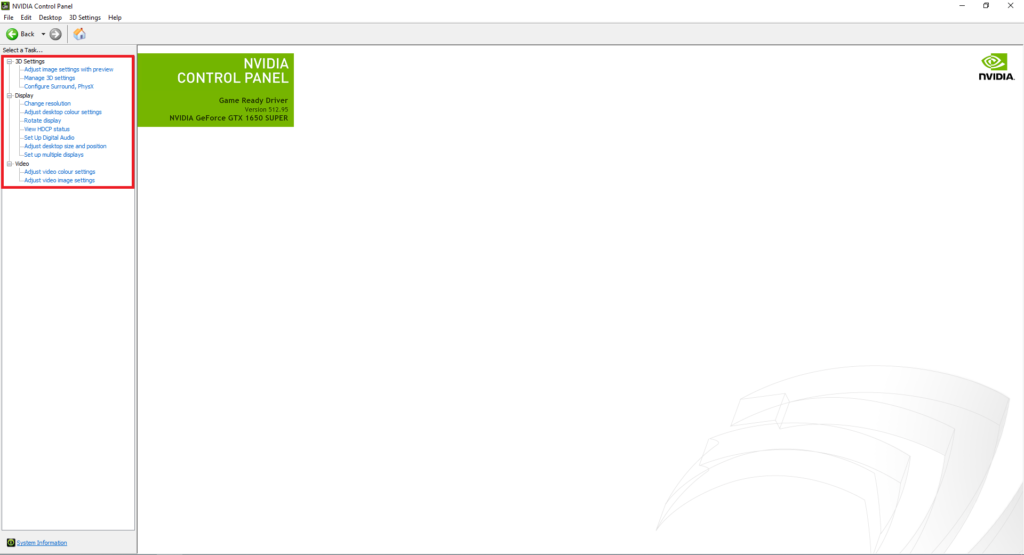
Right-click anywhere on the desktop and select Nvidia Control Panel from the context menu. Doing so will bring up the Control Panel window where you get to see an extensive assortment of 3D Settings along with Display and Video options. Without further ado, let us jump into these sections and explain their significance right away.
1. Adjust Image Settings With Preview
Starting off with the first sub-component of 3D Settings, Adjust Image Settings with Preview determines the manner in which the GPU needs to be utilized for gaming and productivity tasks. The available list of options for this setting inside the Nvidia Control Panel is as follows:
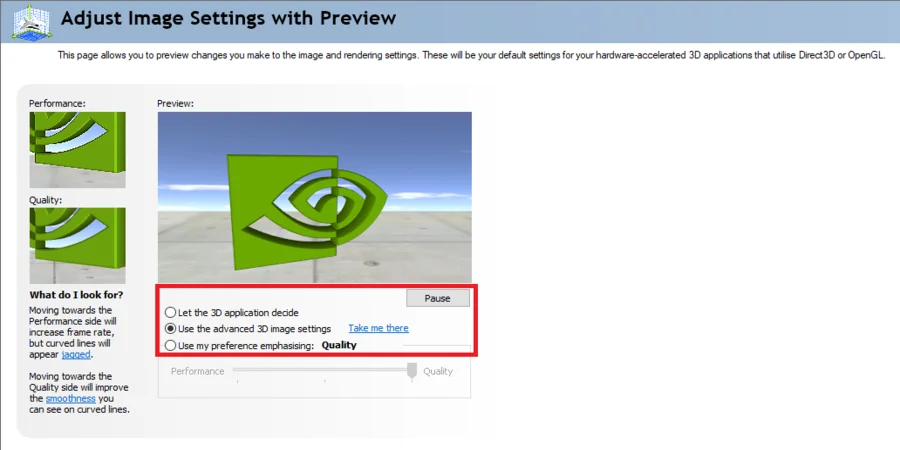
- Let the 3D application decide: Selecting this option disables the impact of any Nvidia Control Panel adjustments on 3D applications.
- Use the advanced 3D image settings: Selecting this option allows the Nvidia Control Panel to override/enhance settings that have been tweaked for 3D applications.
- Use my preference emphasizing (Performance/Balanced/Quality): Selecting this option enables a slider that can be used to assign pre-determined settings for 3D applications.
For those users who are willing to override or enhance additional 3D settings inside the Nvidia Control Panel, it is recommended that they select Use the advanced 3D image settings as their default option. Once it has been modified, proceed to the Manage 3D Settings section for further customization.
2. Manage 3D Settings
Manage 3D Settings is by far the most important section inside the Nvidia Control Panel that displays a slew of graphics options grouped under the Global Settings as well as the Program Settings tab. While the Global Settings tab is responsible for saving any changes made by the user to all 3D applications on their system, the Program Settings tab does the opposite, registering modifications on a per-application basis.
To get yourself acquainted with the overwhelming list of features and options available inside the Manage 3D Settings section, consider taking a look at all the major settings that have been discussed in detail down below.
Image Scaling:
Nvidia Image Scaling is a driver-based upscaling feature that has been considered as a viable alternative to DLSS (Deep Learning Super Sampling) on non-RTX GPUs. Unlike DLSS which employs AI-based upscaling techniques, the Image Scaling tool inside the Nvidia Control Panel makes use of a directional scaling algorithm along with adaptive sharpening filters to enhance image quality while rendering them at a lower resolution.

The available list of options for this setting inside the Nvidia Control Panel is as follows:
- Off: Selecting this option will disable the Image Scaling feature from the Nvidia Control Panel, rendering 3D applications at their native resolution.
- On (GPU Scaling & Sharpening): Selecting this option enables GPU Scaling and Sharpening effects in 3D applications.
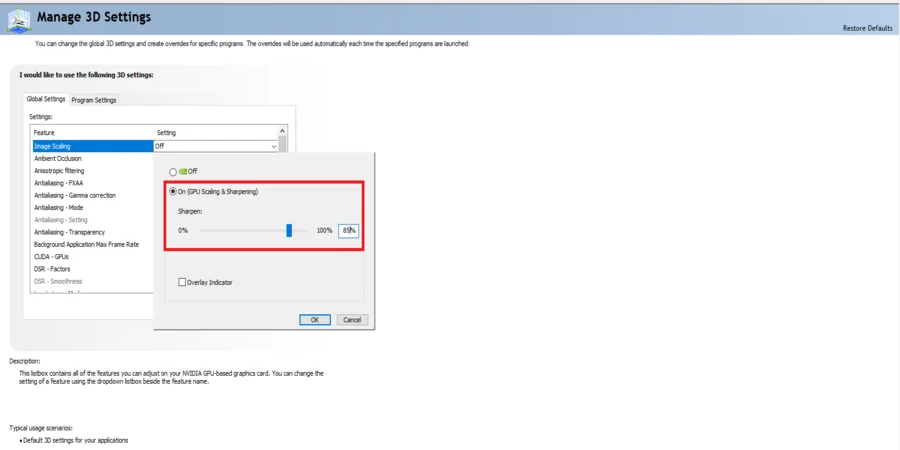
For those users who wish to boost their in-game framerates without compromising much on image quality, try enabling this feature for specific GPU-bound games under the Program Settings tab. On an additional note, make sure that the level of sharpness is set to a minimum of 85% of your monitor’s native resolution. Doing so will reduce visible blurriness in games that implement TAA (Temporal Anti-Aliasing) as the preferred form of Anti-Aliasing.
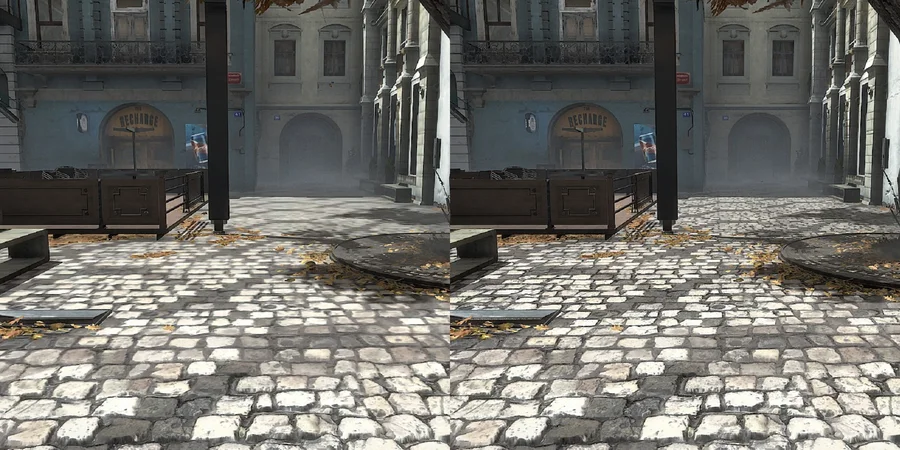
Ambient Occlusion:
Ambient Occlusion is an advanced shading and rendering technique that enhances the perception of depth in 3D environments by simulating soft shadows when indirect or ambient light sources are cast onto a scene. While this setting intensifies the overall presentation of a game by a significant margin, it is also known to have a noticeable impact on GPU performance.

The available list of options for this setting inside the Nvidia Control Panel is as follows:
- Off: Selecting this option will disable the Ambient Occlusion feature in 3D applications.
- Performance: Selecting this option enables a slightly less-realistic form of HBAO+ (Horizon Based Ambient Occlusion), Nvidia’s own implementation of Ambient Occlusion.
- Quality: Selecting this option enables a superior form of HBAO+ for optimal image quality.
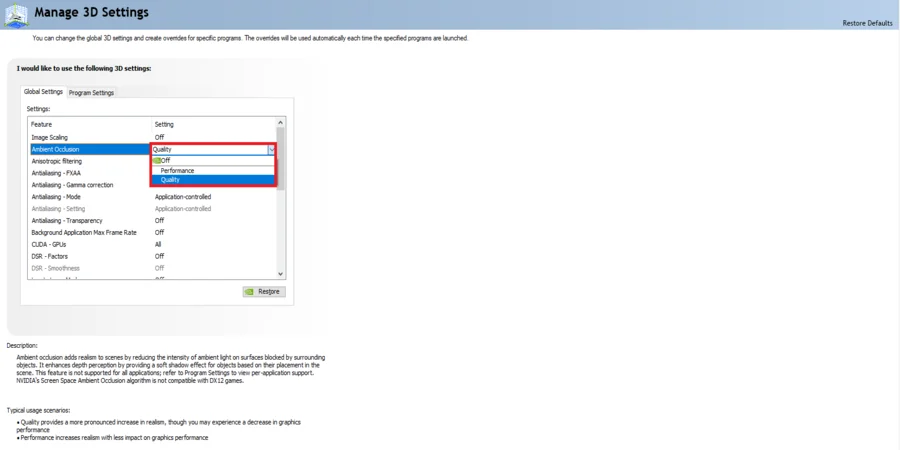
As a general recommendation, refrain from using Ambient Occlusion inside the Nvidia Control Panel if a video game already includes this feature as a dedicated option in its Settings menu. Instead, try forcing the performance-intensive mode of HBAO+ from the Program Settings tab for older games that do not have access to this shading technique.
Anisotropic Filtering
Anisotropic Filtering is a non-linear texture filtering technique which, when enabled, ensures that the distant surfaces in 3D environments look sharper and appear more detailed. Not only does this setting eliminate aliasing effects from objects and/or materials situated at a distance but it also improves upon the primitive filtering methods (Bilinear and Trilinear Filtering) by a significant reduction in visual artifacts.
The available list of options for this setting inside the Nvidia Control Panel is as follows:
- Application-controlled: Selecting this option allows 3D applications to use their own, built-in Anisotropic Filtering methods.
- Off: Selecting this option disables the Anisotropic Filtering method for supported 3D applications.
- 2x/4x/8x/16x: Selecting any of these sample rates will force the appropriate level of Anisotropic Filtering on 3D applications, regardless of their dedicated filtering techniques.
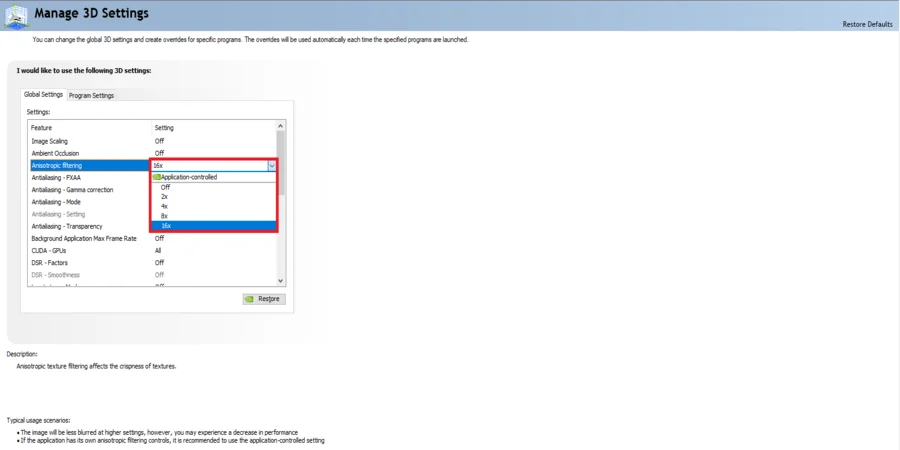
Since modern AAA titles of this generation offer a multitude of texture filtering options in their Settings menu, keep this feature in its default state under the Global Settings tab. However, if you’re consistently playing retro titles that don’t support this texture filtering technique at all, force 16x Anisotropic Filtering for such games through the Program Settings tab.
DSR-Factors:
Dynamic Super Resolution, also referred to as DSR, is a supersampling feature that allows a user to render video games at much higher resolutions than their monitor’s maximum supported resolution, and then downscales the image back to the native resolution of the display. Think of it as a ‘brute force’ method of Anti-Aliasing that collects more pixel samples from a scene to improve upon the clarity of textures and shader effects by a wide margin.

While DSR can be computationally expensive even on modern mid-range to high-end GPUs, you can always use this supersampling technique on games that are quite a few generations old. To enable DSR-Factors inside the Nvidia Control Panel, click on the relevant option under the Global Settings tab and select the proper resolutions based on your preferences.

For instance, if the native resolution of your monitor is 1920×1080, check the boxes next to 1.78x and 4.0x to unlock 1440p (2560×1440) and 4K (3840×2160) resolutions. Moreover, try experimenting with the DSR Smoothness setting located underneath to find the perfect balance between image sharpness and blur.
Additional Tweaks:
Alongside these features, here are a few additional settings for you to modify inside the Nvidia Control Panel that can help optimize system performance and responsiveness.
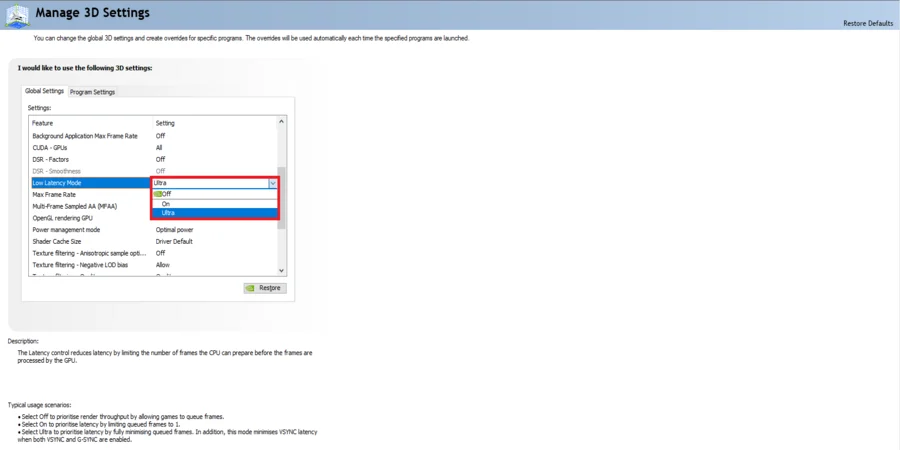
- Low Latency Mode is an exclusive feature present inside the Nvidia Control Panel that minimizes input lag and allows for a more responsive gameplay experience. From the available list of options, select Ultra if a game you’re intending to play is GPU-bound. However, if you come across micro stutters and inconsistent frame times while playing that game, disable this feature entirely from the Global Settings tab.
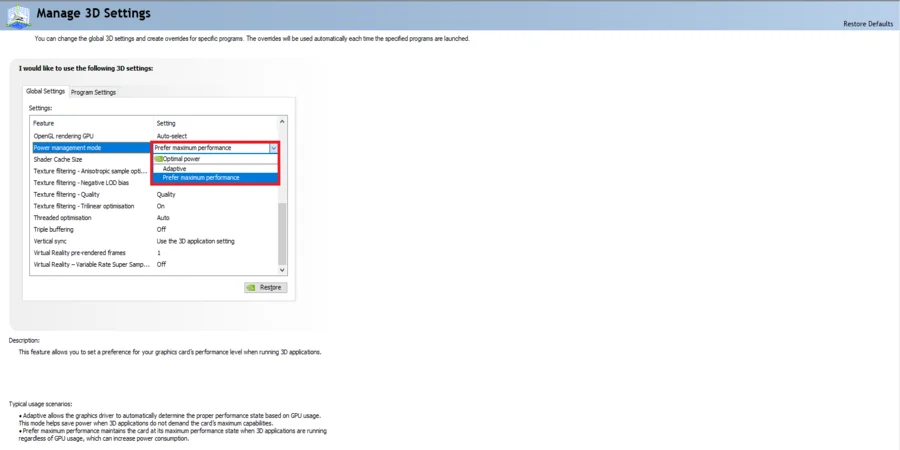
- Power Management Mode is a crucial setting inside the Nvidia Control Panel that allows a user to select definite performance levels on their GPU. While Optimal Power is often regarded as the preferred option for maintaining a decent balance of performance and efficiency on your GPU, you can try switching to the Prefer Maximum Performance option for specific games that suffer from poor CPU/GPU utilization.

- Vertical Synchronization, commonly referred to as Vertical Sync or V-Sync, is an essential feature available inside the Nvidia Control Panel that synchronizes the frame rate and refresh rate of a monitor to eliminate potential screen tearing issues. If your GPU is capable of delivering consistent frame rates that are more in line or higher than the refresh rate of your display panel, enable V-Sync along with a Frame Rate Limiter to achieve stable frame time graphs throughout your gameplay sessions. However, if you already own a G-Sync monitor with variable refresh rate technology, then there is little point in enabling this feature from the Control Panel.
That will be all! I hope you found this article useful. If you encounter any issues while modifying distinct settings inside the Nvidia Control Panel, feel free to leave a comment down below.