

Stickies on macOS is an extremely useful application that allows you to keep track of all your day-to-day activities in an efficient manner. Regarded by many as the digital rendition of ‘post-it’ notes, Stickies can store essential pieces of information (texts, images, URLs, etc.) that appear as visual reminders on your Macbook or iMac.
Although the Stickies app has been with us since the days of macOS X, it didn’t receive any major updates that improved upon its core functionalities. Instead, both the Notes and Reminders app on the current version of macOS (12.0 Monterey) act as viable alternatives that feature a more modern user interface along with a wide variety of customization options.
Nevertheless, if you’re willing to use a versatile, note-taking tool to create constant reminders for your upcoming tasks, here’s how to make the most out of Stickies on macOS. Make sure that you go through the entire article to gain a better understanding of all the features exclusive to this application.
1. Create a New Stickies Note on macOS
Creating a new Stickies note on macOS is fairly simple. Follow the steps listed down below:
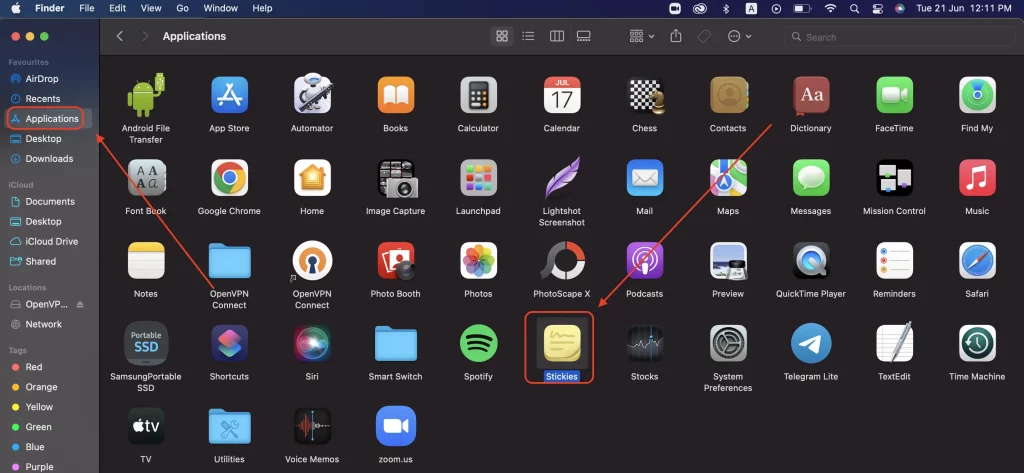
Step 1: From the Home Screen, navigate to the Dock section and click on Finder. After that, double-click on Stickies present inside the Applications section.
OR
Hit Cmd(⌘)+Space Bar to bring up Spotlight on the Home Screen. Type ‘Stickies’ in the Search Bar and press Return to launch the application.

Step 2: If this is your first time using the Stickies app on macOS, a couple of introductory notes will appear on the screen that provides basic information about the inherent functionalities of this tool.
Close both of these notes and add a new one to your Home Screen by clicking on File>New Note. Alternatively, you can press the Cmd(⌘)+N keys on your keyboard to open up a new Stickies note.

That’s it! You have successfully created a new Stickies note on macOS.
2. Open Multiple Stickies on macOS
If you want to add multiple Stickies on macOS, follow the steps listed down below:
Step 1: Create a new Stickies note from the Applications section in Finder or open an existing one on the Home Screen.
Step 2: Click on File and then on New Note to open a new Stickies note on the Home Screen.

By pressing the Cmd(⌘)+N keys repeatedly on your keyboard, you will be able to add multiple Stickies for storing different types of information.
3. Change the Color of a Stickies Note on macOS
If you prefer color coding a specific Stickies note to differentiate it from others, follow the steps listed down below:
Step 1: Create a new Stickies note from the Applications section in Finder or open an existing one on the Home Screen.
Step 2: Click on Color in the menu bar located at the top of your screen.

Step 3: Pick a color of your choice from the available list of options. Additionally, you’ll be able to change the default color code of every Stickies note from Yellow to a different color based on your preferences.
Once you’ve chosen a color that you’d like to use on all of your Stickies, head over to Window and click on Use as Default to maintain a consistent color code across the board.
4. Change the text Formatting for a Stickies Note on macOS
If you want to change the Font Style of a specific Stickies note or adjust the Font Size of the text present inside it, follow the steps listed down below:
Step 1: Create a new Stickies note from the Applications section in Finder or open an existing one on the Home Screen.
Step 2: Click on Font in the menu bar located at the top of your screen.

Step 3: Select Show Fonts from the available list of options and modify the Font Size and Style of your text.
On an additional note, you’ll be able to perform basic functions like Single or Double Strikethrough on a specific line of text or change the default color of that text inside the Fonts window.
5. Make a Stickies Note Float on Top of Other Windows
If you want a specific Stickies note to stay on top of all other windows during your productivity sessions, follow the steps listed down below:
Step 1: Create a new Stickies note from the Applications section in Finder or open an existing one on the Home Screen.
Step 2: Click on Window in the menu bar located at the top of the screen.
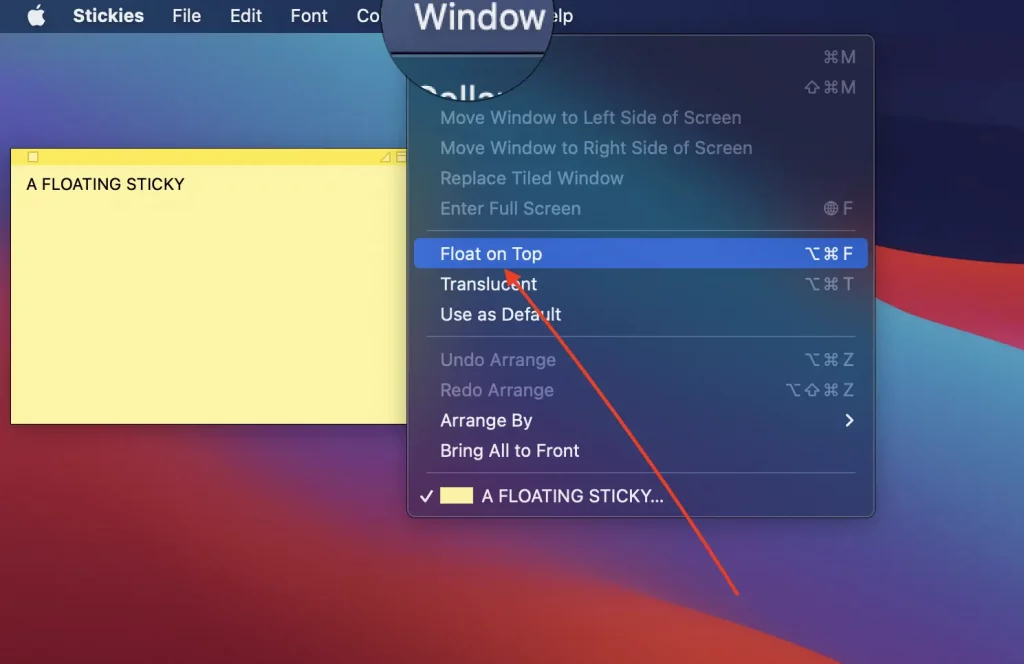
Step 3: Select Float On Top from the available list of options.
Now, you’ll be able to see all of your Stickies float on top of other applications, even if they are in full-screen mode.
6. Make a Stickies Note Translucent on macOS
If you think that all of your Stickies are taking up a lot of space inside other windows, here’s how to make them translucent by following the steps listed down below:
Step 1: Create a new Stickies note from the Applications section in Finder or open an existing one on the Home Screen.
Step 2: Click on Window in the menu bar located at the top of your screen.

Step 3: Select Translucent from the available list of options.
Now, all of your Stickies will appear semi-transparent on top of other applications, even if they are in full-screen mode.
7. Collapse a Stickies Note on macOS
If you want to shrink the size of a Stickies note even further, here’s how to collapse them by following the steps listed down below:
Step 1: Create a new Stickies note from the Applications section in Finder or open an existing one on the Home Screen.
Step 2: Click on Window in the menu bar located at the top of your screen.

Step 3: Select Collapse from the available list of options.
Alternatively, you can press the Cmd(⌘)+M keys or double-click on a Stickies note to collapse or expand it inside other windows.
8. Arrange Multiple Stickies on macOS
If you want to arrange multiple Stickies present on the Home Screen in a particular order, follow the steps listed down below:
Step 1: From the Home Screen, navigate to the menu bar and click on Window.
Step 2: Select Arrange By from the available list of options.

Step 3: Choose an Arrangement option based on your preferences.
Color: Selecting this option will arrange all the Stickies in reverse order of their color codes.
Content: Selecting this option will arrange all the Stickies in alphabetical order by determining the first letter of a text.
Date: Selecting this option will arrange all the Stickies based on their date and time.
Location on Screen: Selecting this option will arrange all the Stickies based on their position on the screen. (Left to Right)
After selecting any of these options, all the Stickies will be arranged in a definite pattern on the left side of your screen.
9. Import/Export Notes on macOS
For those of you who are unaware of this feature, it is possible to import text files on a Stickies note or export a note to another application as a text file. To get acquainted with this method, follow the steps listed down below:
Step 1: If you want to import text files on a pre-existing Stickies note, click on File and then on the Import option.
On the flip side, if you want to export a Stickies note as a text file, click on File>Export and select the appropriate destination folder.
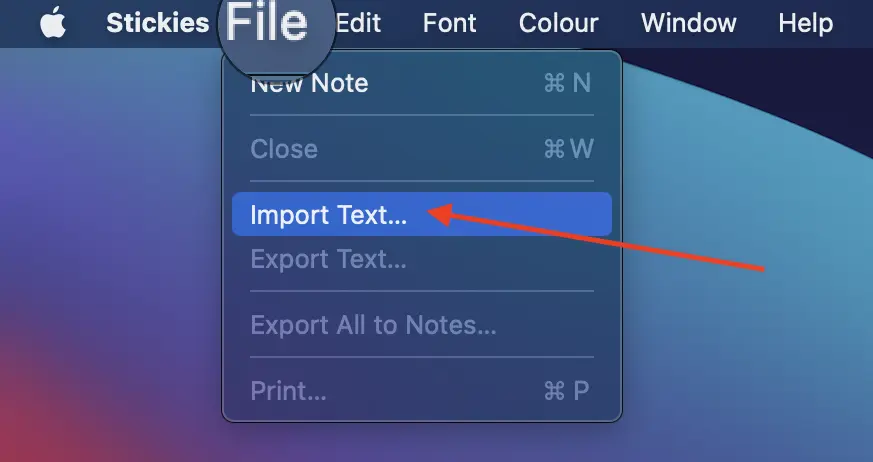
Step 2: If you want to export all of your notes from Stickies to the Notes app, click on File>Export and then on the Export All option to initiate the transfer process.
By following all the aforementioned methods, you should be able to make a substantial difference to your daily workflow using the Stickies app on macOS.
Hope you found this article helpful! For more simple yet intuitive How-To guides, leave a comment down below.