

While many of us love meticulously cherry-picking major hardware components (CPU, GPU, RAM) for our brand new Gaming/Editing rig, we often fail to understand the importance of stress testing them for optimum system stability. With a wide variety of stress testing applications at our disposal, not only can we introduce artificially intense workloads to push these components to their absolute limits but can also evaluate their reliability in the long run.
For those of you who didn’t know, stress testing applications have been around for quite some time and are mainly used by tech enthusiasts to validate the performance of newly released hardware under extreme conditions. By repeatedly performing a bunch of complex mathematical calculations, such utilities present the absolute worst-case scenario for physical parts that can help reveal weak points in a system.
Therefore, if you’re planning to overclock your CPU, GPU, and Memory (which you should, by the way, for free FPS!) or you’re having stability issues with an aging system, here’s how you can stress test your PC using an extensive assortment of third-party applications. Make sure you go through the entire article to get yourself acquainted with the stress testing methodology!
Hardware Monitoring Tools to Use While Stress Testing Your PC
Although there have been ongoing debates surrounding the credibility of stress testing applications and how these ‘power viruses’ produce unrealistic workloads on a specific set of hardware, modern PCs are susceptible to such performance-intensive operations owing to a more efficient architecture.
However, it doesn’t mean that they are infallible as pushing a physical component beyond its manufacturer-defined power limits can cause the entire system to shut down abruptly, hindering the process altogether.
To prevent such anomalies from damaging your hardware, make sure that you continuously monitor relevant parameters (Temperature, Voltage, Clock Speeds) while stress-testing a PC. With a slew of hardware monitoring tools available on the Internet, users are often overwhelmed when it comes to choosing the right utility for this job.
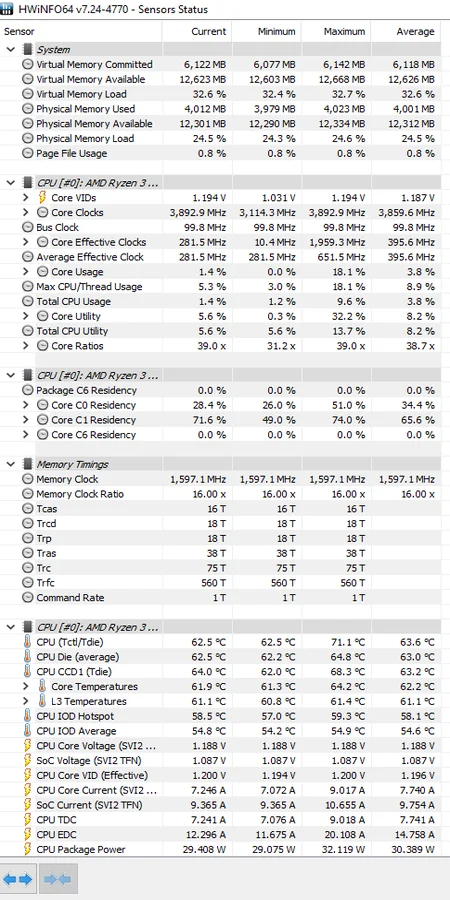
Nevertheless, both HWiNFO and HWMonitor are versatile hardware monitoring tools that provide an all-in-one solution by reading practically any sensor output in real-time and then carrying it over to a log file.
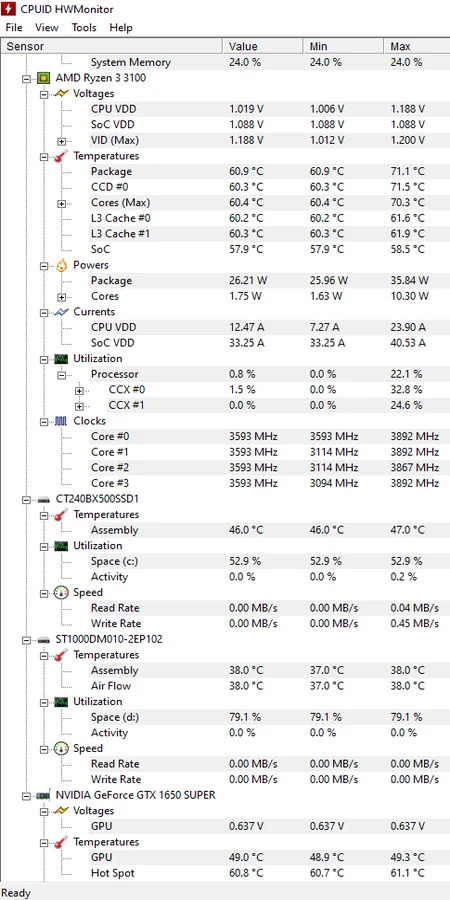
Furthermore, both of these utilities are free for personal use and feature an intuitive UI (User Interface) that keeps track of multiple core components (CPU, GPU, RAM, Motherboard) under intense workloads.
To use these monitoring programs in unison with different stress testing applications, head over to the official website of HWiNFO/HWMonitor and download the appropriate software version (64-bit/32-bit) on your PC. Once it’s done, run the executable file to initiate the installation process and you should be good to go!
On an additional note, try delisting unnecessary sensor readings (HDD S.M.A.R.T Data, Memory Timings, Network Speeds, etc.) from these applications to avoid irregular polling intervals or information delay during a stress test.
Stress Test Your CPU Using Prime95
If your PC suffers from frequent stability issues or outright crashes in the middle of an operation, the Central Processing Unit is likely to blame for such abnormalities. Since modern CPUs are heavily reliant upon temperature and power targets to ramp up their core frequencies, a misjudged overclock can often cause them to malfunction.

To ensure that the CPU is devoid of any overheating issues and/or computational errors after an overclock, it is advisable that you make use of a synthetic benchmark to run stress tests for an extended period of time.
With that said, when it comes to stress testing CPUs using an extremely reliable tool, Prime95 is undoubtedly the go-to option in this regard. Being an official client of the GIMPS (Great Internet Mersenne Prime Search) computing project, Prime95‘s primary intentions were based on the hunt for Mersenne Prime Numbers (i.e. any prime number that satisfies the mathematical equation: 2^p – 1).
However, the Torture Test that came bundled with the program was soon embraced by several hardware enthusiasts owing to its production of performance-intensive workloads for both CPU and Memory in tandem. Till date, Prime95 has received support on almost all the major Operating Systems (Windows, Linux, macOS) along with feature updates at regular time intervals.
For those users who are willing to test out the stability of their CPUs using Prime95, follow the steps listed down below:
Step 1: From your preferred web browser, head over to the official website of Prime95 using this link: Prime95
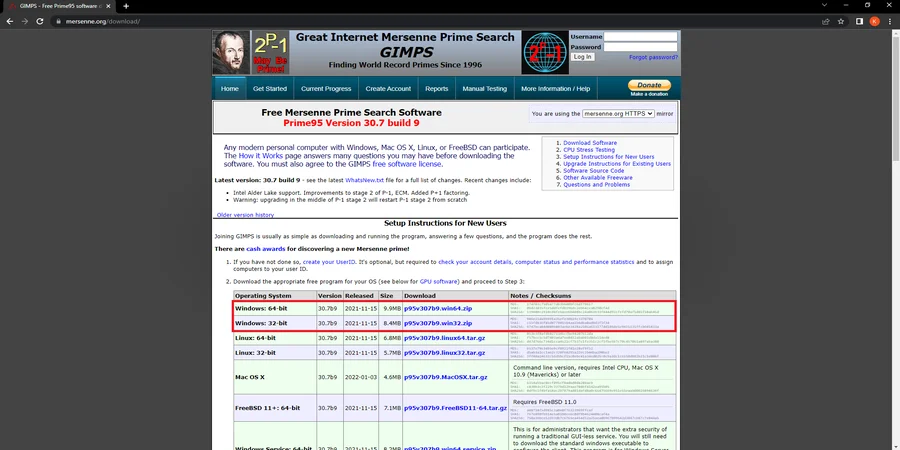
Step 2: Download the appropriate software version based on your Operating System and its instruction set. (64-bit/32-bit)
Step 3: Extract all the contents of the .zip file into a separate folder and run the program by double-clicking on the Prime95 executable.
Step 4: Select “Just Stress Testing” once the initial prompt appears and take a look at the Torture Test options to gain a better understanding of their respective workloads.
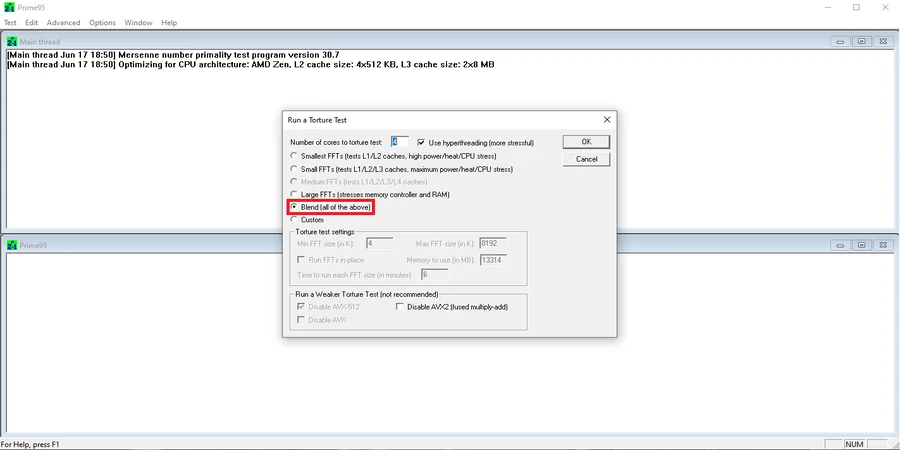
Step 5: To maximize CPU Temperature and Utilization, select either Small or Large FFTs from the available list of options. However, if you’re willing to stress test both the CPU and System Memory to determine the cooling standards of your Laptop or mini-ITX PC, use the more conservative Blend test that has been specifically designed to detect potential computational errors from a steady overclock.
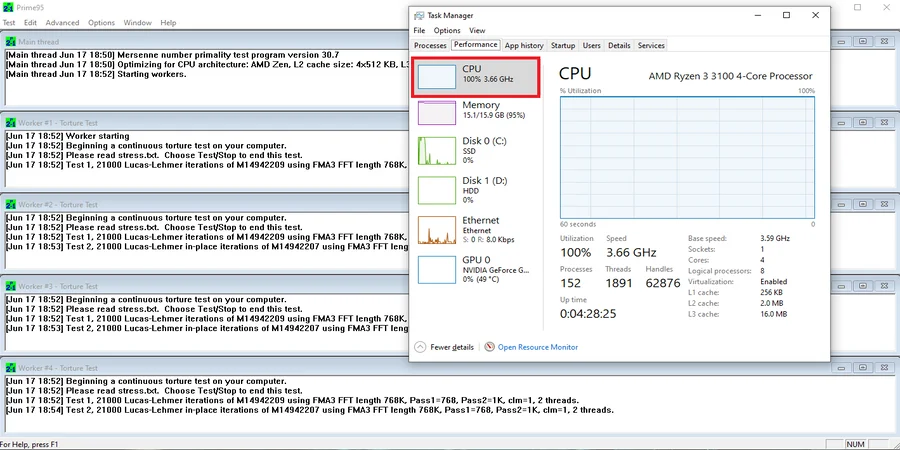
As a general recommendation, run the Prime95 stress test for at least 30 minutes to an hour on a Desktop or Laptop that is to be used primarily for gaming and other productivity-based workloads. On the flip side, if you’re into relentless video editing sessions that require additional processing power, run the Prime95 stress test for 24-48 hours before jumping to any conclusion.

Since Prime95 hits your CPU the hardest in terms of core temperature and overall utilization, AIDA64 often acts as a viable alternative for many tech enthusiasts due to its simulation of real-world processes. However, one of the main disadvantages of using AIDA64 is based on its ‘freemium’ acquisition model wherein users need to upgrade to a premium license after using the trial version for a maximum period of 30 days.
Stress Test your GPU Using UNIGINE Benchmarks
Unlike synthetic benchmarks that operate on a definite set of instructions for CPU-intensive workloads, stress testing a GPU is often centered around the implementation of real-world benchmarks after an overclock. Since GPUs are subjected to high utilization standards throughout their life cycle for most 3D applications and games, consistency remains to be of utmost importance when adjudging their reliability in the long run.
Although FurMark has been widely regarded by many tech enthusiasts for setting up the gold standard in GPU stress testing, the program is also infamous for its unrealistic workloads that are difficult to handle on even the beefiest of GPUs.
For a more practical approach toward GPU stress-testing, consider using any of three benchmarks provided by Unigine: Heaven, Valley, or Superposition. However, if you aren’t familiar with the entire procedure, follow the steps listed down below:
Step 1: From your preferred web browser, head over to the official website of Unigine using this link: Unigine
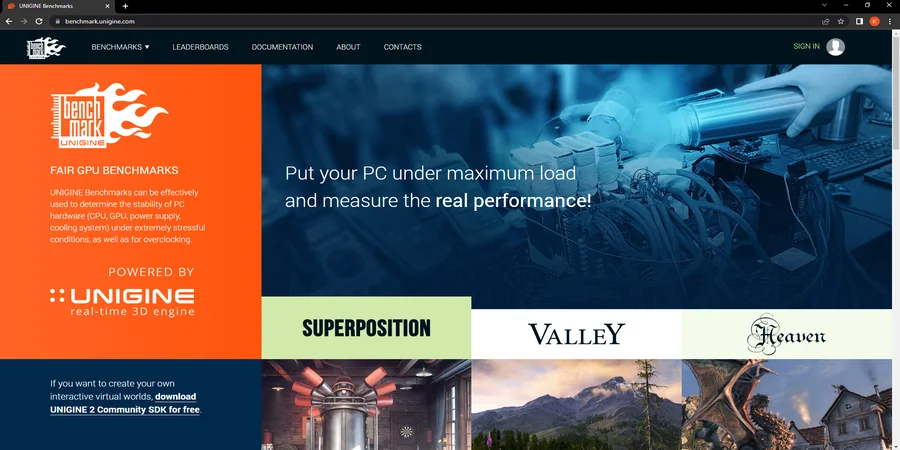
Step 2: Navigate to Products & Services and click on the Benchmarks tab to download the relevant benchmarking tool on your PC.
Step 3: After downloading any of these utilities, run the executable program and follow the on-screen instructions to initiate the installation process.
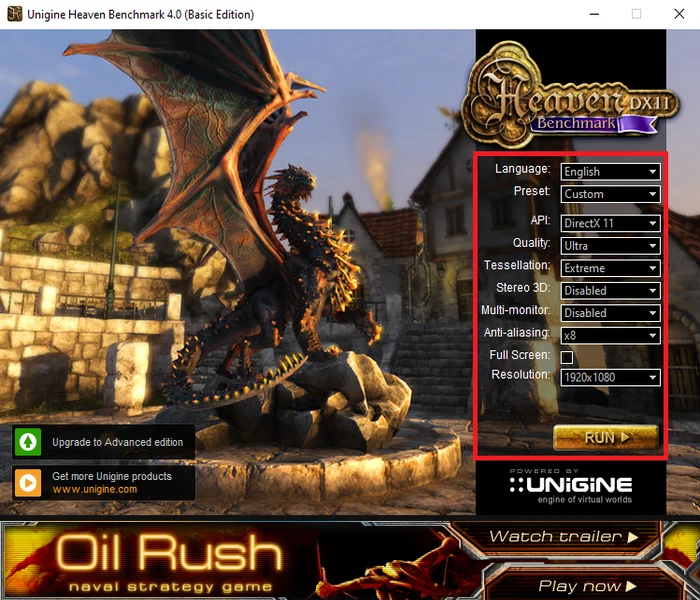
Step 4: Once it’s done, launch the Heaven/Valley/Superposition benchmark and select Extreme from the available graphical presets. On an additional note, ensure that the Display Resolution is set to its maximum value and the Full-Screen option is disabled.
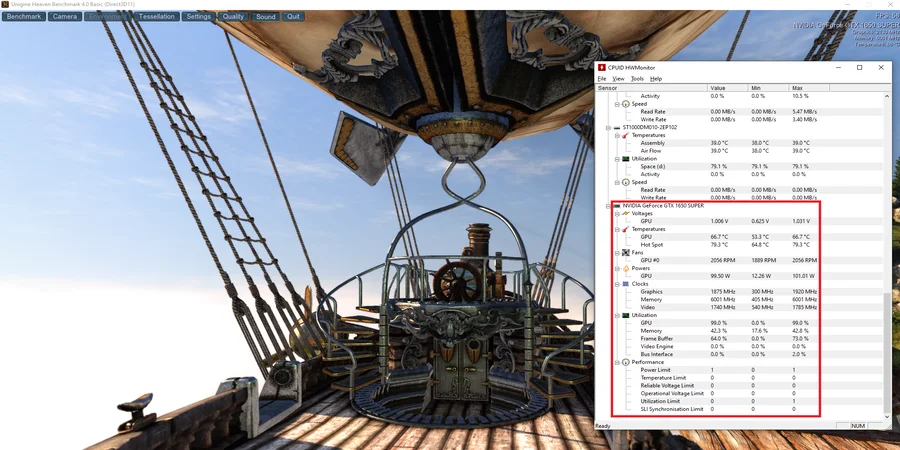
Step 5: After making these changes, run the Heaven/Valley/Superposition benchmark and keep a tab on the monitoring tool for any fluctuations in GPU Temperature and Utilization. If you come across any visual artifacts and/or glitches while running the stress test on an overclocked GPU, reduce its Core and Memory Clocks to a stable state until such graphical anomalies disappear from the benchmark completely.
When the test results are deemed satisfactory after running the Unigine benchmark for an hour or so, fire up an extensive, in-game benchmark (like the ones included in popular AAA titles such as Grand Theft Auto V and Red Dead Redemption 2) to allow for a more detailed analysis of GPU performance in real-world applications.
Stress Test Your System Memory Using MemTest86
When it comes to Memory Overclocking, most of us refrain from any manual adjustments and stick to the standard XMP (Extreme Memory Profile) configuration for a modest improvement in transfer speeds. However, if a specific Memory module is incompatible with a pre-calculated factory overclock, it might lead to severe issues with the overall stability of a system.

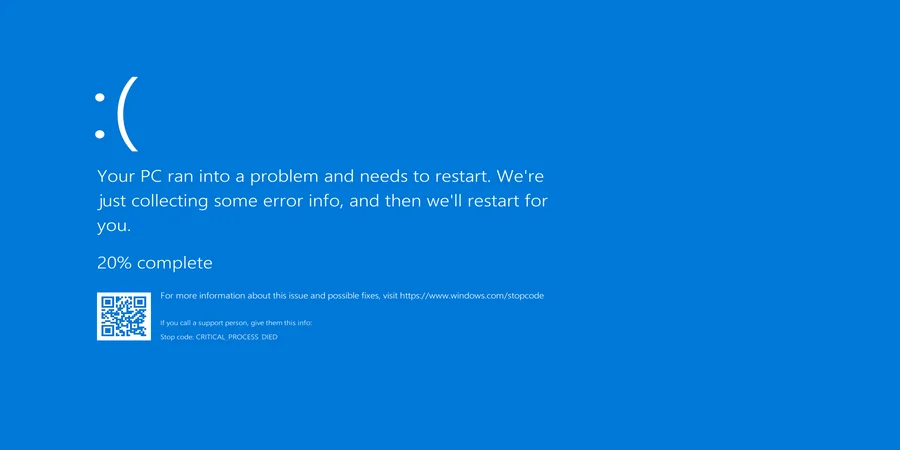
To mitigate frequent BSoDs (Blue Screen of Death) from plaguing your system, it is advisable that you stress test each Memory module with an advanced diagnostic tool.
In this regard, MemTest86 is undoubtedly the most effective program that examines and reports the user of any persistent errors related to their System Memory. Unlike most other stress-testing applications, MemTest86 is a bootable utility that requires a user to download and install the program on a USB flash drive.
Once a bootable USB drive has been created, restart your PC and head over to the Boot Menu by pressing the appropriate key (F2, F10, F12, or Esc) on your keyboard.
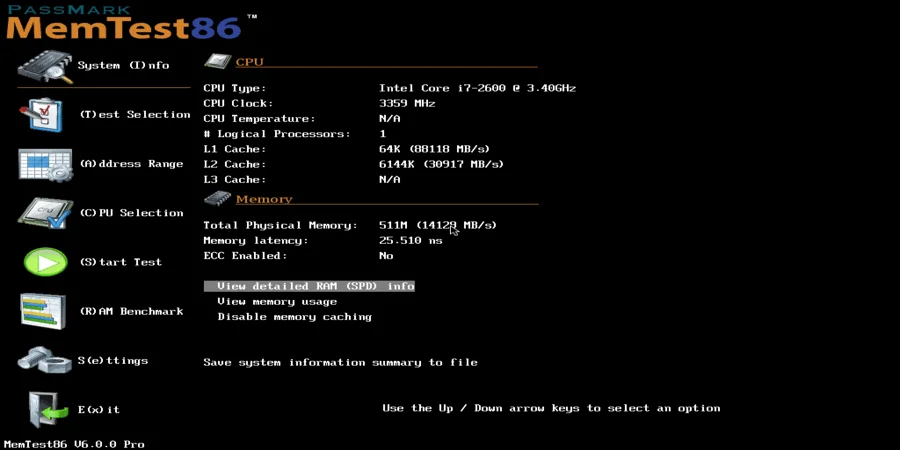
When you boot into the MemTest86 program from your USB flash drive, click on the Config option followed by (S)tart Test on the home screen. As the duration of this stress test is dependent on the capacity of each memory module, the entire process may take a while to complete.
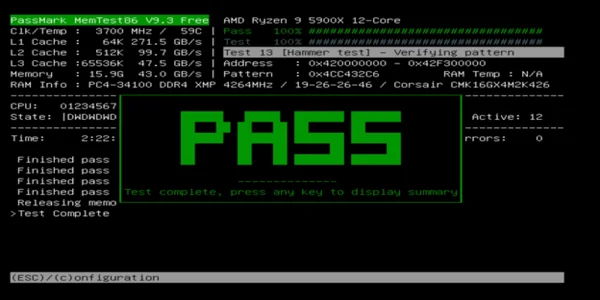
If the stress test is successful, MemTest86 will generate a PASS remark on the screen, denoting that the System Memory is in stable working order. However, if the program detects an abnormality with any of the Memory modules, it will include an extensive list of all the major computational errors exclusive to that module.
Maintain a Stable Experience across the Board!
With the right set of stress-testing tools in possession, you’ll be able to measure the operational safety and thermal capacity of your PC without a hitch! As is evident from the entire article, synthetic benchmarks aren’t always representative of the real-world performance and can only provide limited information on how your system stacks up against sustained workloads.
For a PC that you want years of service from, consider running it through multiple stress tests along with real-world benchmarks at periodic intervals. As for the choice regarding the best stress-testing applications to be installed on your Desktop, Laptop, or Workstation, it all boils down to personal preference!
Hope you found this article helpful. Let us know down in the comments section about the utilites that you intend to use while stress-testing a PC.