

Mechanical keyboards have come a long way in their life cycle and continue to be one of the most significant computer peripherals in the market. So, if you are in the market for a mechanical keyboard, oh boy, you are in for a ride. The rabbit hole goes deep, Neo, if you know what I mean!
Well, if you don’t know (that was a Matrix reference, by the way), be sure to read this article till the very end cause I am going to tell you everything that I did wrong when buying my first custom (kinda) mechanical keyboard. This way, you will get an idea about some of the most important aspects that should be considered before buying your first mech keyboard. Sounds good?
7 Important Things to Consider Before Buying a Mechanical Keyboard
Now, below I have listed the top 7 things that you should really think about before getting your first mechanical keyboard.
However, before moving on, it is worth mentioning that the custom mechanical keyboard hobby is more than what you think you know and is quite expensive once you get to dig deep. I mean, a GMK base set can cost a whopping $200!
However, the good news is with more and more people getting into this unusual hobby, many companies have now started offering enthusiast-level custom keyboard kits and accessories at reasonable prices. Now, what are enthusiast-level keyboards, you ask? All in good time, my friend.
1) Do Not Go for the Generic Brands!
Now, when I ventured into the mechanical keyboard path, I did not want to want to get a generic, gamer-type keyboard full of RGB and clicky sounds.
So, if you also want a truly customizable board that you could use for gaming, typing, or your daily tasks without compromising on typing feel and sound profile, it is better to avoid generic mechanical keyboards that you get on Amazon or other e-commerce platforms.
Hence, before blindly going in for a mass-produced mechanical keyboard with Outemu Blue switches (you will know what they are soon), integrated cable, and a soldered PCB, do a bit of research on your own about the keyboard brands that offer quality pre-built and customizable mechanical keyboards that you will be able to fully customize as per your needs and desire.
Brands like Keychron, Epomaker, Wuque Studio, Akko, and Ducky are some that offer high-end as well as budget keyboards that come pre-built with soldered and/ or hot-swappable PCBs or DIY kits in which you have to assemble the entire keyboard with the provided parts.
In my case, I went with Ducky and got myself a Ducky One2 Mini 60% keyboard with Cherry MX Browns. However, now I regret not getting the Ducky One3 Mini instead just for its hot-swappable capabilities. What is that, you ask? Let’s check out right below.
2) Soldered or Hot-Swappable? Always Hot-Swappable!
Now, soldered and hot-swappable might sound alien to your ears but they are nothing but the types of PCB (Printed Circuit Board) that are used to build mechanical keyboards. When mechanical keyboards were prevalent back in the day, they used to only come with a PCB with soldered connections.
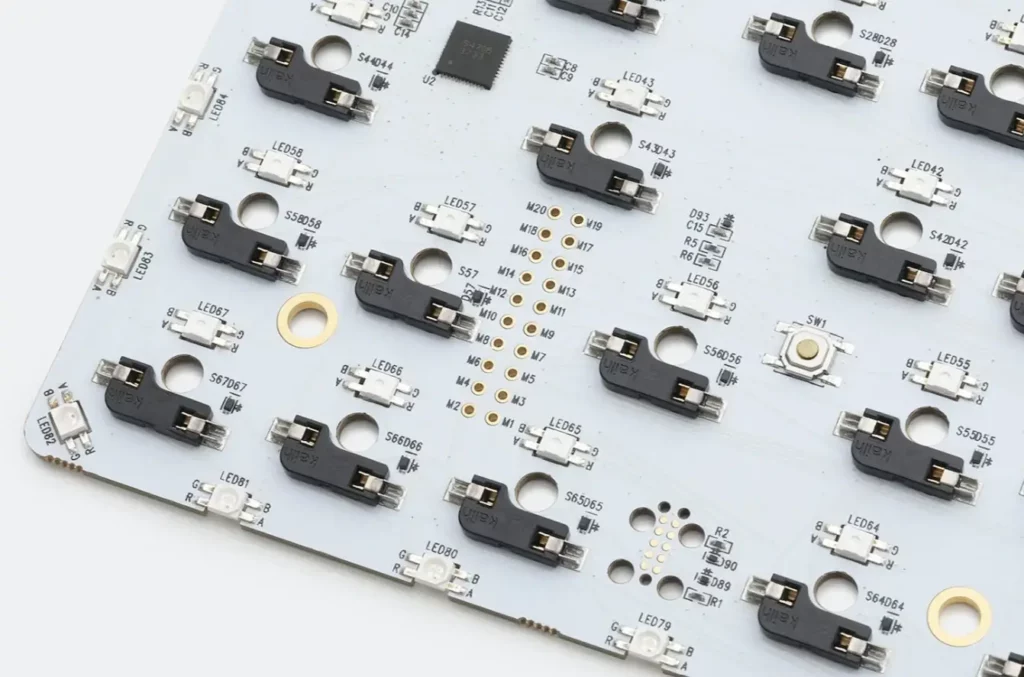
This means that each of the key switches of the mechanical keyboard was individually soldered to the circuit board and taking them out to swap them with other switches was not an option.
However, when mechanical keyboards gained popularity in recent times, modern companies, by taking community feedback, developed hot-swappable PCBs that come with soldered switch sockets for each switch on the keyboard.
This allowed users to truly customize their mechanical keyboards and easily swap out key switches to try out different customizations before finalizing their end-game switch type.
So, if you want to truly customize your mechanical keyboard and try different switches out of the thousands that are now available in the market, be sure to go for a hot-swappable mechanical keyboard.
And the best thing is that keyboards with hot-swappable capability are not as expensive as they used to be just a few years back.
3) Choose the Right Layout
Now, other than choosing the type of PCB you want, you need to choose the right layout for your mechanical keyboard. The layout refers to the arrangement of switches on your keyboard.
The most common keyboard layout is the full-size keyboard that comes with 104 keys, including the alpha-numeric area with punctuations and modifiers, the arrow key area in the middle along with some operation keys, the Numpad at the extreme right, and the dedicated F-row (F1 to F12) at the top.
However, do you really need the Numpad or the F-row on your keyboard? If your answer is no, there is good news for you. Mechanical keyboards come in various layouts that eliminate certain key areas on the keyboard to make the entire board compact.
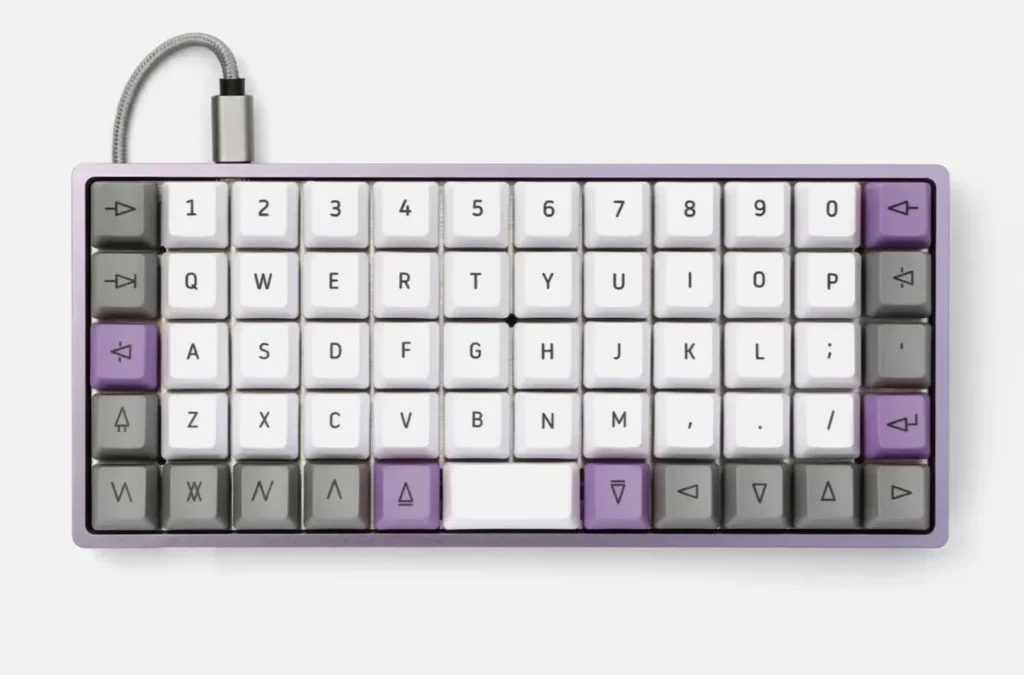
So, if you do not want a full-size, 104-key board, you can go with the uber-popular TKL or Tenkey-less layout that comes without a dedicated Numpad.
There is also an 80% layout that comes without the Numpad and the F-row. Other than these, there are also 75% boards, 65% boards, and 60% boards that come with even lesser keys and a more compact form factor.
My Ducky One2 Mini keyboard is a 60% keyboard, which means it neither has the Numpad nor the F-row. Unlike 65% of keyboards like the Ducky One2 SF, it does not even have the arrow cluster.
In compact boards like these, users need to use different layers with a dedicated Fn key to use the F-row keys and other function keys like Delete, Page Up/ Down, and others.
4) Linear, Tactile, or Clicky?
Wondering what is this heading about? Well, it is about the element that will define the typing experience on your mechanical keyboard – the key switches.
Unlike membrane keyboards, mechanical keyboards work with individual key switches that are connected to a PCB, either with a soldered connection or to hot-swap sockets. And when it comes to key switches for mechanical keyboards, there are thousands of options to try from.

However, taking a look at the basics, mechanical key switches are broadly categorized into three distinct categories, and they are, you guessed it right – linear, tactile, and clicky. You can check out the basic properties of each of the types of key switches explained right below.
Linear – Starting with the most popular one, the linear switch is a mechanical key switch type that has a smooth overall travel due to its design and construction.
These switches do not provide any kind of physical feedback and deliver a smooth bottom-out for mechanical keyboards, which is preferred by gamers and users who like a smooth typing experience.
Linear switches are usually marked by red stems (the part that pops out of a switch). However, with so many options now available in the market, red-stem switches do not always mean linear.
Some popular examples of linear switches are Cherry MX Red, Cherry MX Black, Gateron Red, Gateron Yellow, NovelKeys Cream, and Gateron Ink Black.
Tactile – Next comes the tactile switch type, which is considered the middle child amongst the linear and clicky switch types. Tactile switches are designed and constructed in a way that they provide a physical bump with each key press to let users know that the key was registered.
Unlike linear switches, tactile switches do not have a smooth bottom-out as you will be able to feel a tactile bump at the actuation point of the key switch.
This property of tactile switches makes them a pretty good switch option for those who type a lot. This is because physical feedback is really important when you are touch-typing as it essentially lets you know that the key was actually registered and it was not a false tap.
Tactile switches usually come with brown stems, though it does not apply now as there are many tactile switches with different-colored stems. Some popular and community-approved tactile switches are Cherry MX Browns, Boba U4T Tactiles, Drop Holy Pandas, Kailh Speed Coppers, Durock T1s, and Topre Tactiles.
Clicky – Now, the clicky switch type is, well clicky and usually produces a high-pitched, click sound with each key press. The clicky switches are constructed so that they can provide physical as well as auditory feedback. In simple words, when you type on a keyboard with clicky switches, you will hear the sound of at least 50 mouse clicks in a minute, on average.
When mechanical keyboards started gaining popularity in the market, buyers usually tilted towards clicky switches as they produced the generic, clickety-clack sound of OG mechanical keyboards.
However, with keyboard enthusiasts showcasing different kinds of keyboards and switches on social platforms like YouTube, Reddit, and Facebook, people now know what a good mechanical keyboard could sound like.
So before getting your first mechanical keyboard, you need to decide if you are in the linear gang, tactile gang, or clicky gang. If you want a smooth and fast typing experience on your keyboard, go for the linear, and if you want a subtle tactile bump to know when a key switch actuates, choose the tactile switch type. And if you want to annoy your office colleagues, join the clicky gang dawg!
Other than considering the switch type, you can also decide how heavier or lighter the switch would be on your keyboard. This is determined by the type of spring the switch is using.
The amount of force that is needed to press a switch is directly proportional to the weight of the spring inside.
This means if you want your switches to be heavier, go for heavy-springed switches like Cherry MX White or Cherry MX Tactile Grey, both of which have an actuation force of 80g. And if you want lighter switches, choose the ones that have a lower actuation force.
5) PBT or ABS? Double-Shot or Dye-Sublimated? The Keycap Dilemma!
Now, the thing about keycaps is that if you buy a pre-built mechanical keyboard just as I did, your peripheral will come with stock keycaps that will most probably be OEM profile keycaps. However, if you get a barebones mechanical keyboard kit, you will need to buy a keycap set yourself. And there are so many options to choose from.

Firstly, you need to choose the type of plastic with which the keycaps will be made. Next, you will need to choose the manufacturing process of the keycaps, and finally comes the profile selection. These might sound overwhelming at first but worry not, I have explained what these are right below.
PBT vs ABS – Polybutylene terephthalate (PBT) and Acrylonitrile Butadiene Styrene (ABS) are the two types of plastic materials that are used to produce keycaps.
Both of these plastics have different properties that affect the look, feel, and wear and tear of keycaps. Generally, PBT keycaps are considered higher quality because of their composition and the fact that they do not shine over time.
ABS, on the other hand, is considered an inexpensive option as the quality of plastic is inferior to PBT and ABS keycaps tend to develop a shiny surface with usage that kinda looks cheap.
However, one advantage of ABS is that the plastic can be molded easily and can hold colors much more efficiently than PBT. Hence, ABS keycaps come in more vibrant color options than PBT keycaps. In fact, GMK keycaps, which are considered the best keycaps in the industry, are made with ABS plastic rather than PBT.
Double-Shot vs Dye-Sublimated – Next, comes the manufacturing process of the keycaps. The double-shot and dye-sublimation processes are two of the most common manufacturing processes used to produce keycaps and put the legends (the alphabet, symbol, or number on the keycaps) on top of them.
The double-shot process essentially uses two layers of plastic to produce the keycaps. The lower layer of plastic is used to represent the key legend and the upper layer simply covers the legend layer from the top.
This way, the legends on the keycaps do not easily fade as they are molded onto a different layer of plastic altogether instead of being simply printed on the keycaps.
The dye-sublimation process, on the other hand, uses a single layer of plastic and the legends are essentially printed on the keycaps using colored dye.
Although this process is considered to be inferior, there are many quality keycaps that come with dye-sublimated legends.
The Keycap Profiles – Now, other than the type of plastic and the manufacturing process, keycap profiles play a significant role in determining your typing experience.
Keycap profile essentially refers to the height of the keycaps for the different key rows on the mechanical keyboard. You have your OG Cherry profile that has been prevalent for a long time.
However, now there are a variety of keycap profiles, ranging from uniform-row profiles, and lowered-row profiles, to very high-row profile keycaps. There is the SA profile, the DSA profile, the XDA profile, and many others.
So, if you require new keycaps for your new or old mechanical keyboard, check out all the options in the market and choose the right kind of keycaps that fit your need. The keycaps will not only affect the typing experience but will also determine how your keyboard will look.
However, if you are starting out, let me tell you right off the bat that keycaps are pretty expensive and might be even more expensive than your keyboard itself.
There are cheaper options available from local vendors but I would not recommend you buy them as they tend to have a few unwanted issues like light leaking, fuzzy legending, and a few others.
So, if you want quality, in-stock keycaps, go for the keycap sets offered by companies like Akko, Ducky, Idobao, and other similar brands.
You can also check out Drop’s offerings as they offer many collab keycap sets like Lord of The Rings keycaps or Marvel-themed keycap sets. Although they are a bit more expensive than Akko or Ducky keycaps, compared to GMK, they are quite inexpensive and offer similar quality and profile.
6) Group Buy or In-Stock?
Now, if you are unfamiliar with the concepts of a group buy and in stock, let me explain!
Group buying is a process of buying keyboards that follows the same concept as Kickstarter projects. Manufacturers showcase a prototype keyboard design and list their offerings for a limited period of time. Interested buyers can place their order and pay upfront to confirm their keyboard during the said time period.
After the group buy closes, the orders go to the manufacturers who start working on them. Hence, keyboards from the group buy take a lot more time to ship and arrive in your hands, sometimes even up to 2 years, and tend to be more expensive in the after-markets due to their exclusivity factor.
In-stock keyboards, on the other hand, are available readily on manufacturers’ websites and ship as soon as any other product you buy online. They are also priced reasonably and offer many features inspired by group-buy keyboards.
So, if you are just starting out your mechanical keyboard journey, go for in-stock keyboards rather than spending time and money on group buys.
Group buys usually tend to offer enthusiast-level keyboards (remember this term?), meaning that they come with high-end materials, unique mounting designs (the way the keyboard is assembled with all the parts), and highly-customizable elements like knobs and badges.
7) Want to Mod? Choose Your Keyboard Accordingly!
Now, the last thing you should consider before getting your first mech keep is that if or not you want to do some mods on your keyboard.
Mods are nothing but simple tweaks and changes that you can implement on your mechanical keyboard to enhance the typing, sound, and overall feel of the keyboard. There are numerous mods that you can try to make your mechanical keyboard truly personal and tuned to your taste.
There is the Tempest tape mod, which involves putting masking tape, or any kind of tape for that matter, at the back of your keyboard PCB to make it sound poppier.
There is the PE foam mod that relies on a thin sheet of PE foam, which goes between the PCB and the plate of your keyboard.
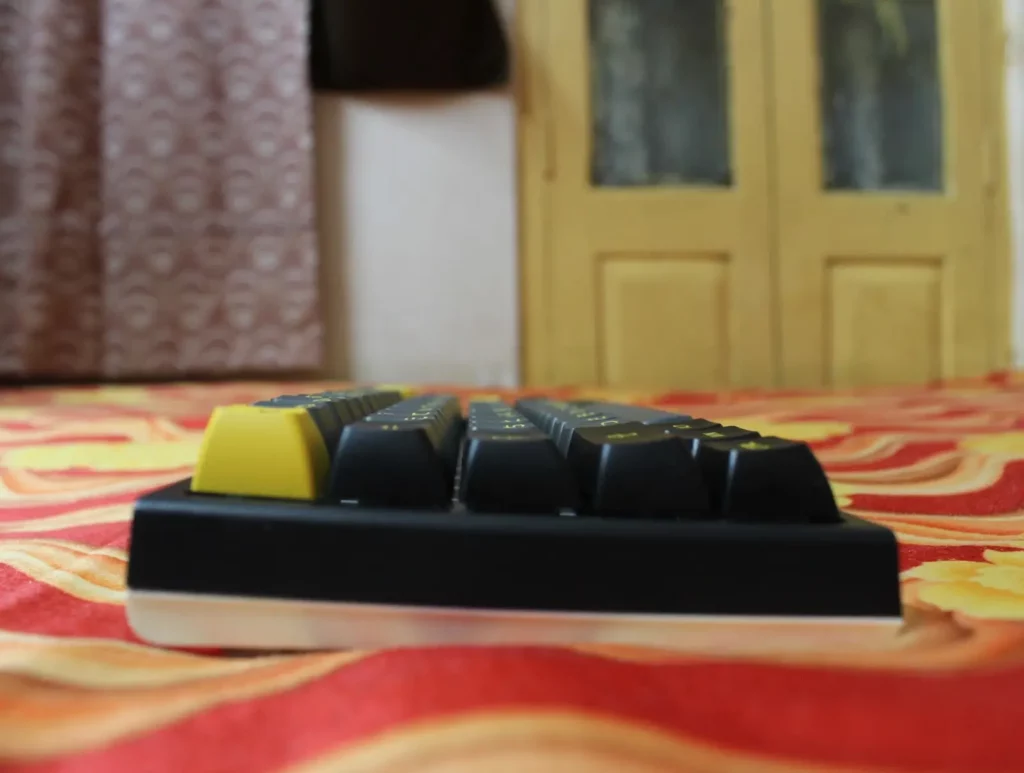
I did some mods on my Ducky One2 Mini to improve its sound and enhance the overall typing experience and I was not bad, to be honest.
Most of my mods did work and the keyboard became much better than how it came in the box. You can watch my video on YouTube to check out all the mods and changes that I did on my board right below.
Final Words
Now, I know that this article did not turn out to be what you expected when you started your search for a simple mechanical keyboard for your setup.
However, these are indeed some of the basic things that you need to know before getting your first mechanical board.
There is much more than this in the mechanical keyboard hobby that you would want to know once you start falling into the rabbit hole. And if you read this article till this point, chances are you are already deep inside the hole and there is no going back!