
Adding comments to folders and files on your PC can be quite useful if you are looking for an effective way to organize and manage all of your digital content. However, the process itself can be intimidating as Windows does not include a dedicated option for this feature.
Adding comments to your Windows folders and files is possible through a bunch of third-party applications, but their reliability remains at stake. You might not be comfortable using such applications, not to mention, the amount of time and effort you waste figuring out which one of them will be the best for this task.
In this article, I will be discussing the most efficient methods using which you can add comments to both folders and files in Windows 10 without the need for any third-party applications. I will also be explaining the use-case scenario and limitations of such a feature. Therefore, it is recommended that you go through the entire article to get a better picture of what you are about to do.
How to Add Comments to Folders in Windows 10?
The first section of this article will deal with the ways in which you can add comments to folders in Windows 10 using desktop.ini files.
Before listing all the necessary steps required to perform this task, you should know about the purpose of desktop.ini files.
What are ‘desktop.ini’ Files?
desktop.ini files in Windows regulate how folders should appear on the operating system. By default, these files usually stay hidden inside folders and hold certain information about those folders such as their localized name, location, function as well as the icons to be used for their representation.
As mentioned earlier, no version of Windows has ever supported a standalone comment feature for its folders. Although you can create shortcuts to certain folders and add comments to them, it’s not the ideal way to go about it and can end up cluttering your desktop. Thus, editing desktop.ini files within folders is the only viable alternative using which you can add comments to your folders.
1. Adding the Comments Column Within File Explorer
As you might already know, Windows 10 doesn’t list the Comments column in any of the drives or directories within File Explorer by default. You will need to add it manually to make your comments for folders visible. To do so, follow these steps:
Step 1: Open File Explorer and navigate to the drive(s) or directory(ies) where you store all your folders and files.
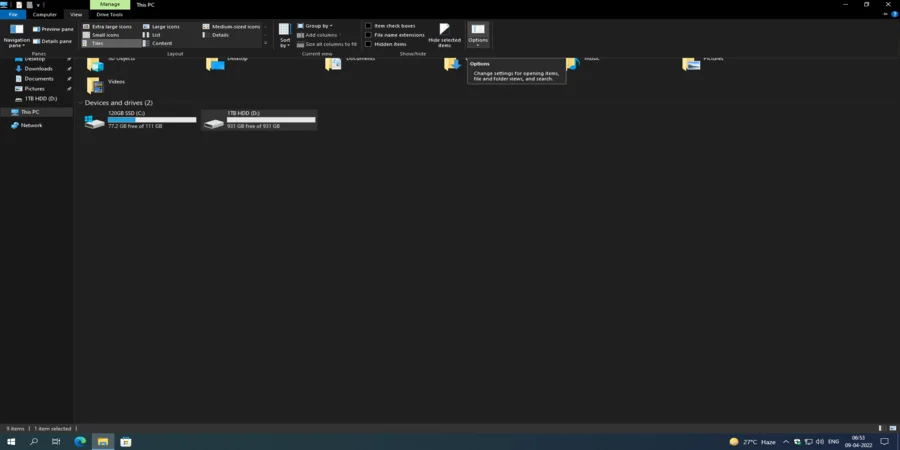
Step 2: Go to View and click on the Details option.
Step 3: Once you have selected the Details option, you will notice that there are four pre-defined columns – Name, Date modified, Type, and Size. To insert additional columns, click on Add Columns from the View tab.

Step 4: Select Choose columns from the drop-down menu.
Step 5: A new window will open. Scroll down a bit and you will see the Comments column option. Check the box.
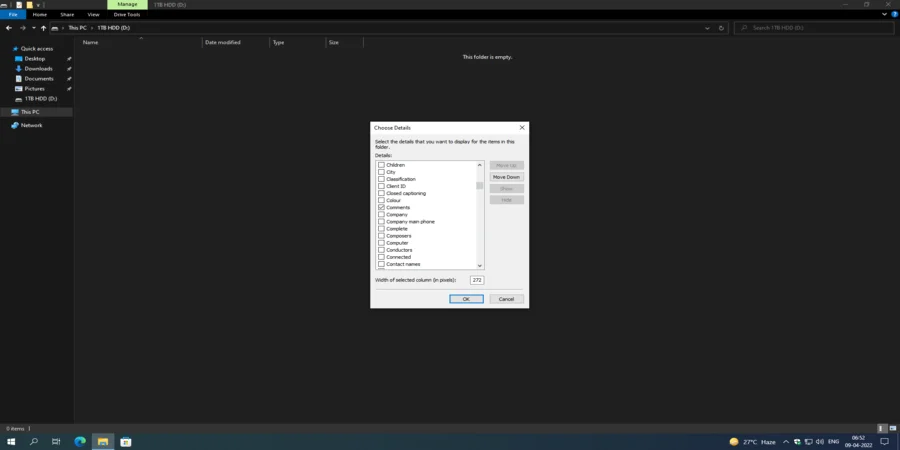
Step 6: Click on OK and close the window. The Comments column will be added. You need to perform the same steps for the number of drives/directories you have in your system.
2. Adding Custom Comments to Folders Using desktop.ini Files
By default, Windows does not let you view the desktop.ini files. Since these are rather sensitive configuration files that hold the potential to break your system, as a safety measure Windows hides them from you to avoid any unwanted mistakes.
However, revealing them is redundantly easy.
Once you have unhidden all hidden folders and operating system files, you will be surprised to see that some of the pre-installed folders within File Explorer (Music, Pictures, and Videos) will include comments under the Comments column by default. In case you didn’t know, you can always hover your mouse pointer over these folders to get certain comments that describe their functions.
For all the general folders that you have created manually in Windows 10, you will need to process and edit their desktop.ini files to add custom comments. Follow these steps:
Step 1: You won’t be able to access the desktop.ini file inside a general folder as the file has not been processed yet. To do this, set a custom icon to your folder.
If you are unaware of this method, right-click on the folder and select Properties from the drop-down menu.
Step 2: Under Properties, click on the Customize tab.
Step 3: Choose any icon of your preference from the available list. Click on Apply and close the window.

Step 4: Now, when you open the folder, you will see a desktop.ini file listed along with your personal files. Open it using a text editor such as Notepad.

Step 5: After opening the file, add the following line of text under [.ShellClassInfo].
InfoTip=Write your comment
Step 6: Once you have added this line of text, save the file and close it.
Step 7: Move over to the drive or directory in which the folder is located. You will see that your comment has already been listed under the Comments column. You can also hover your mouse pointer over the folder and it will include the same comment as its description.

After you have made these changes, you can hide all the protected operating system files and folders as well as revert your folder icon to the original one.
Before moving over to the next section of this article, I also want to point out certain limitations of this method that you should consider while incorporating the aforementioned steps.
- You need to edit a desktop.ini file for every folder in which you want to add comments. This makes the process time-consuming.
- The string of text that you intend to add as a comment to your folder must not be lengthy. It is recommended to use a maximum of 5-6 words. Adding more words can often lead to the desktop.ini file not registering your comment. This makes the comment feature less versatile.
- Editing a desktop.ini file can be a bit complicated and you must make sure to not change/delete any of the existing commands in this file.
Unhide Hidden Folders and Protected Operating System Files
Step 1: Navigate to the View tab from File Explorer and click on Options.
Step 2: Click on View inside Folder Options.
Step 3: Under advanced settings, select Show hidden files, folders, and drives.
Step 4: Once you are done making this change, scroll down to find a setting named Hide protected operating system files (Recommended). Uncheck it. Doing this will display a warning message. Click on Yes.

On an additional note, you can also uncheck the setting titled Hide extensions for known file types. This in turn will enable file extensions across all files in Windows 10, a handy feature if you are unable to identify certain file types on your system.
Step 5: Click on Apply and close the window.
How to Add Comments to Files in Windows 10?
Adding comments to files in Windows 10 is relatively easy and does not include editing a desktop.ini file. However, the only limitation to this method is also the most disappointing one. For no obvious reason, Microsoft has prevented users from adding comments to all types of files in Windows 10. This means that certain documents, music, or image files can only acquire comments.
To give you a better sense of this statement, you will be able to add comments to a JPG file but not to a PNG file. Although both of these file types support images, only one of them can make use of the comment feature.
Therefore, you can add comments to certain files in Windows 10 by following the steps mentioned below:
Step 1: Right-click on the file in which you want to add a comment. You will also be able to add the same comment to several files provided that they are of the same file type.
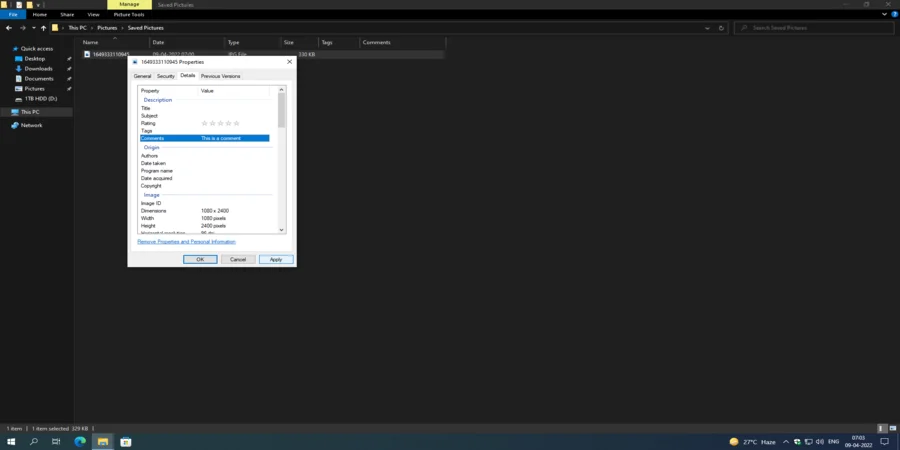
Step 2: Click on Properties from the drop-down menu and move to the Details tab.
Step 3: Under Details, look for the Comments option. Once you have found it, left-click on the option and check if a text box appears. If not, then you will come to know that this particular file does not support the comments feature.
Step 4: Type in a comment of your choice inside the text box and click on OK.
Step 5: After applying this setting, your comment for this file will be visible under the Comments column. If you have selected several files, the same comment will appear for all of them.

To conclude, these are the methods that you can use for adding comments to folders and files in Windows 10. We can only hope for Microsoft to address this issue and include a dedicated option for this feature in a future update, saving users from the hassle of editing a .ini file.
If you found this article helpful, leave a comment down below.
Naturally enough, the files that I need comment/explanations for i.e. Excel files, will not allow me to add comments. Exasperated sigh! But, thanks for all the info.