
Every time you boot into Windows, there are a couple of ‘visual barriers’ that you need to navigate through before accessing the desktop. While the Sign-in screen allows you to enter your password or PIN for logging into the platform, the Lock Screen adds an extra step to this process for no obvious reason.
The Lock Screen in Windows 10/11 might look appealing to some users with a slew of generic background images and news blurbs but it often feels like an unnecessary obstacle to many. Although this feature has a distinct set of advantages for Windows-based Tablets, it looks a bit out of place on both Desktops and Laptops.
Therefore, if you’re looking for a quick and easy way to get rid of the Lock Screen feature in Windows 10/11, here’s how to perform such an action with a bunch of registry hacks.
Without further ado, let’s get started!
1. Disable the Lock Screen in Windows 10/11 Using Group Policy Editor
The Group Policy Editor is an essential Windows Administration Tool that facilitates a working environment for User Accounts. Administrators can configure and/or modify Startup Programs, Network Options, Password Requirements, and other fundamental settings with this tool.
If you’re using the Professional or Enterprise edition of Windows 10/11, here’s how to disable the Lock Screen feature on these versions using the Group Policy Editor:
(Note: Before tweaking and/or modifying any major settings inside the Group Policy Editor, it is important to create a Restore Point in Windows 10/11 that reverts all the actions to a former state if anything goes wrong)
Step 1: Open the Search Bar (Windows+S) or the Run command box (Windows+R) in Windows 10/11.

Step 2: Type gpedit.msc and hit Enter to bring up the Local Group Policy Editor on the Home Screen.
Step 3: Navigate to the left panel and click on Computer Configuration>Administrative Templates>Control Panel>Personalization.
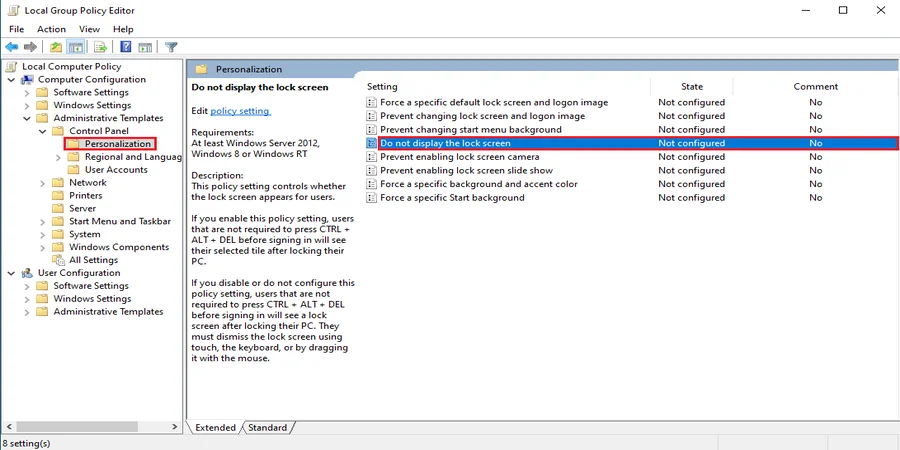
Step 4: Double-click on the Do not display the lock screen option from the available list of settings inside Personalization.
Step 5: Doing so will open up a new window with a bunch of additional options. By default, the Not Configured radio button will remain active, denoting that the Windows 10/11 Lock Screen is enabled.
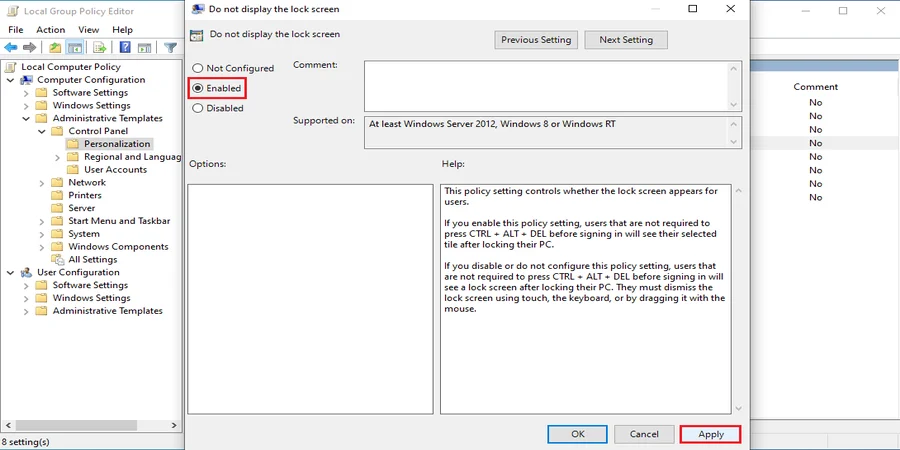
Step 6: To disable the Lock Screen in Windows 10/11, click on the Disabled radio button and then on Apply to save the changes.
After a system reboot, the Lock Screen will be disabled in Windows 10/11, taking you directly to the Sign-in screen.
2. Disable the Lock Screen in Windows 10/11 Using Registry Editor
Similar to the Group Policy Editor, Registry Editor is a hierarchical database in the Windows Operating System that stores a multitude of configuration options for a system to operate efficiently. Every item in the Registry has been assigned a subkey that contains specific information such as location, version, and the primary executable file present inside it.
Since the Group Policy Editor is only available on the Professional and Enterprise editions of Windows 10/11, here’s how to disable the Lock Screen feature on the Home version using the Registry Editor:
(Note: Refrain from configuring and/or modifying key settings inside the Registry Editor without prior knowledge as it can incur stability issues or even data loss)
Step 1: Open the Search Bar (Windows+S) or the Run command box (Windows+R) in Windows 10.
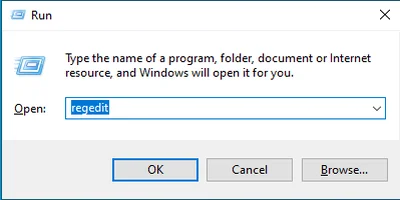
Step 2: Type regedit and hit Enter to bring up the Registry Editor on the Home Screen.

Step 3: Navigate to the left panel and click on Computer>HKEY_LOCAL_MACHINE>SOFTWARE>Policies>Microsoft>Windows.
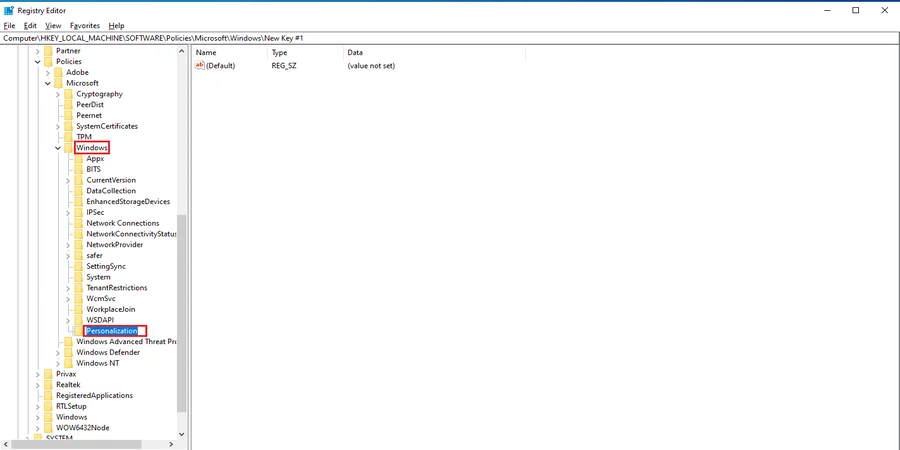
Step 4: Right-click on Windows and select New>Key. Change the name from New Key #1 to Personalization.
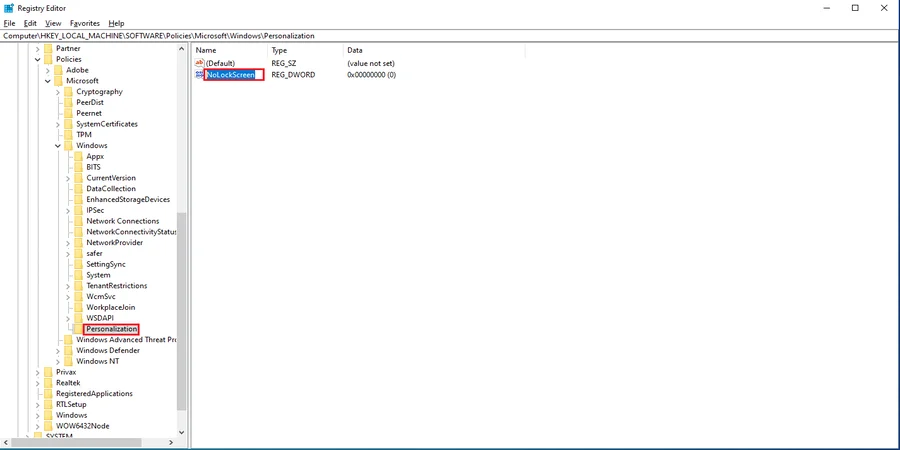
Step 5: Right-click on Personalization and select New>DWORD (32-bit) VALUE and name it NoLockScreen.
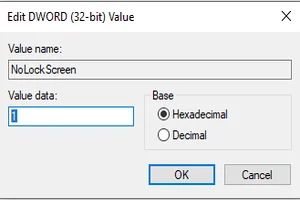
Step 6: Double-click on the NoLockScreen value and set the Value Data to 1. Ensure that the base is set to Hexadecimal.
Step 7: Click on OK to finalize the changes.
After a system reboot, the Lock Screen will be disabled in Windows 10/11, taking you directly to the Sign-in screen.
Additional Tip: Disable the Lock Screen in Windows 10/11 from File Explorer
If you want to opt for a much simpler method to disable the Lock Screen in Windows 10/11 without messing with any of the settings inside Registry or Group Policy Editor, follow the steps listed down below:
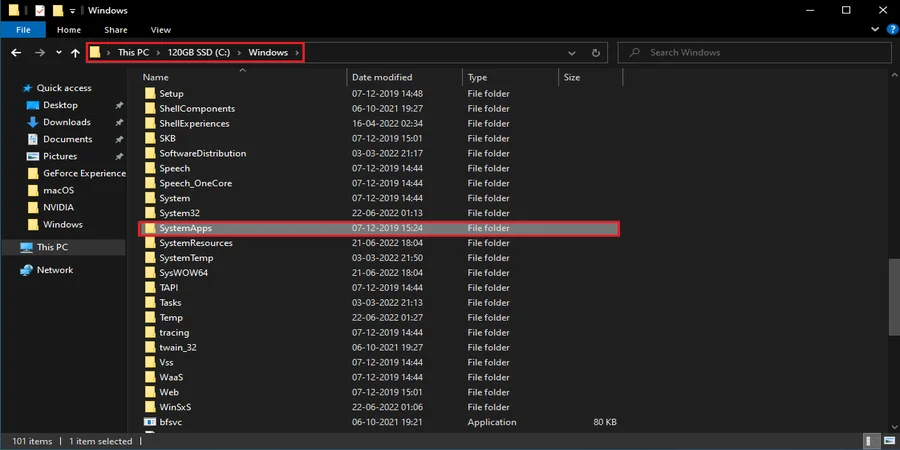
Step 1: From File Explorer, navigate to This PC>(C:)>Windows and click on the SystemApps folder.
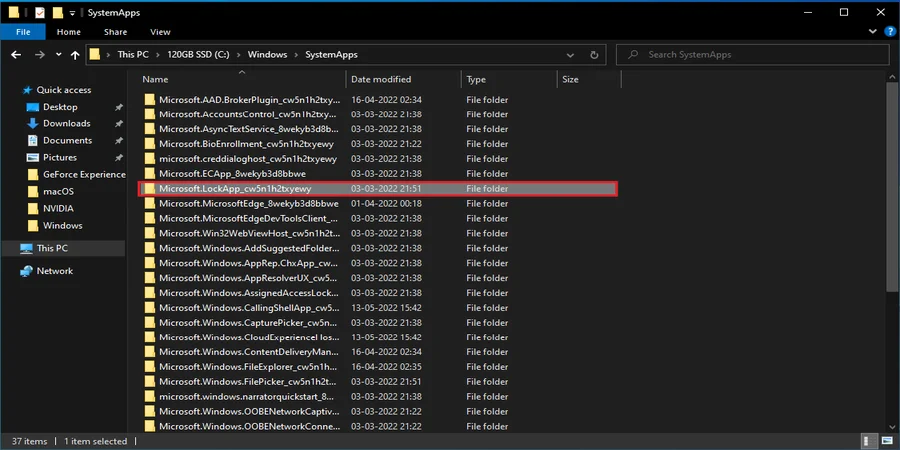
Step 2: Inside the SystemApps folder, look for another folder titled ‘Microsoft.LockApp_cw5n1h2txyewy’.
Step 3: Right-click on the folder and select Rename from the available list of options. Alternatively, press F2 on your keyboard to rename the folder.
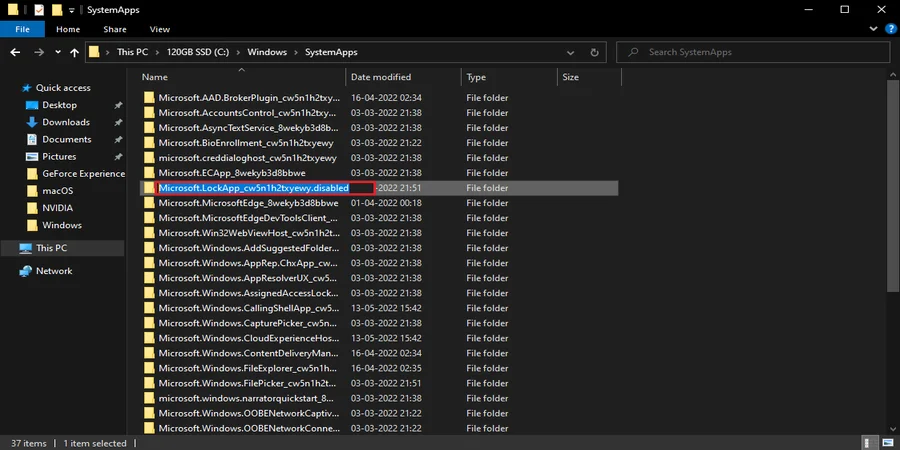
Step 4: Change the Current Folder Name from ‘Microsoft.LockApp_cw5n1h2txyewy’ to ‘Microsoft.LockApp_cw5n1h2txyewy.disabled’ and hit Enter.
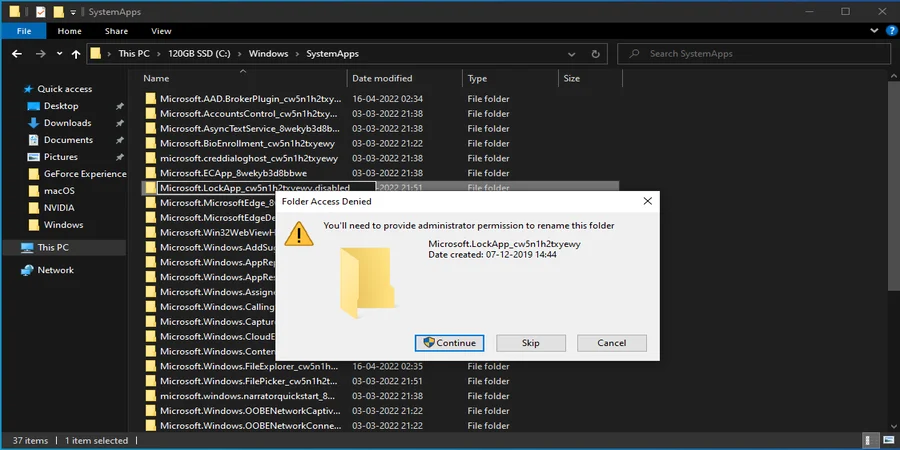
Step 5: When Windows asks for Administrator Permission, click on Continue to confirm the changes.
After a system reboot, the Lock Screen will be disabled in Windows 10/11, taking you directly to the Sign-in screen.
By following the aforementioned methods, you should be able to disable the Lock Screen feature and allow for a seamless Sign-in experience in Windows 10/11.
Hope you found this article helpful. For more simple yet intuitive How-To guides, leave a comment down below.